
Jeremy Davis
Sitecore, C# and web development
There's quite a bit of material out on the internet about creating custom fields in Sitecore. But inevitably, when I found myself with a requirement to create one, I couldn't find anything particularly close to my needs. So here's another post about creating a custom field – maybe it'll be of help to someone...
 url copied!
I wanted to get a quick mock-up sorted, to show the client how this might work. Having done a bit of googling about the custom field types that exist already and read a few blog posts about creating your own fields, I settled on this one as the closest to the requirements I had. (Plus it helpfully linked to some other useful pages) So I set about experimenting with how I could adjust that example to match my needs.
url copied!
First, create a class that will be your field editing control. There are various base types that this could inherit from, but since I wanted all the base behaviour of the standard Single Line Text field, the standard text editing control seemed like a safe bet:
namespace Testing.Fields
{
    public class ItemAutoCompleteField : Sitecore.Shell.Applications.ContentEditor.Text
    {
    }
}
Field types are defined in Sitecore using items in the Core database. Hence you need to create a new item to represent your field type, and to bind the field editor control you've created. Under
/sitecore/System/Field types/
create a folder to hold your custom fields, and the create a new item based on the
/sitecore/templates/System/Templates/Template field type:
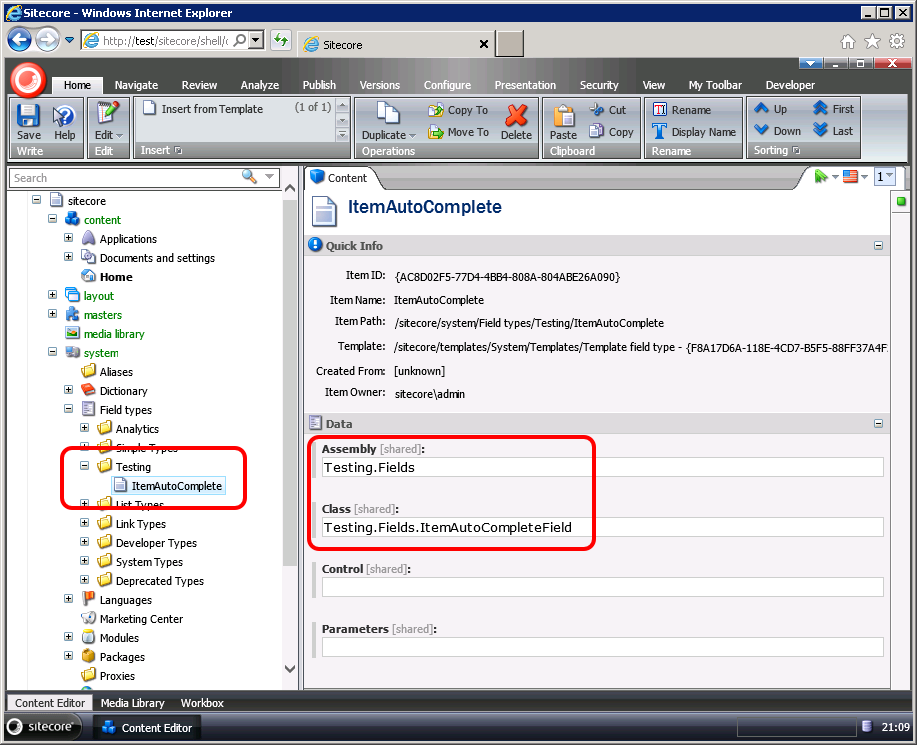
The Assembly field needs filling in with the name of the DLL containing your field editor class. The Class field is filled in with the fully qualified name of your editor.
NB: Take care with these fields. If you specify the Assembly field incorrectly you'll get an error dialog in the Sitecore UI when you try to edit an instance of your field. However it appears that if you get the Class field wrong you don't get an error – the UI silently falls back to a basic text field instead. Thanks to a typo, this had me scratching my head for some time.
If you're adding multiple custom field editors then you might find it easier to use the Control field instead. You use the web.config to register a prefix for the namespace containing your controls and can then fill in only one field in the item above using the "prefix:classname" format. Take a look at this SDN article for details on registering your DLL as a prefix to use in that field that instead.
Once your field type is registered, you can make use of it in a template:
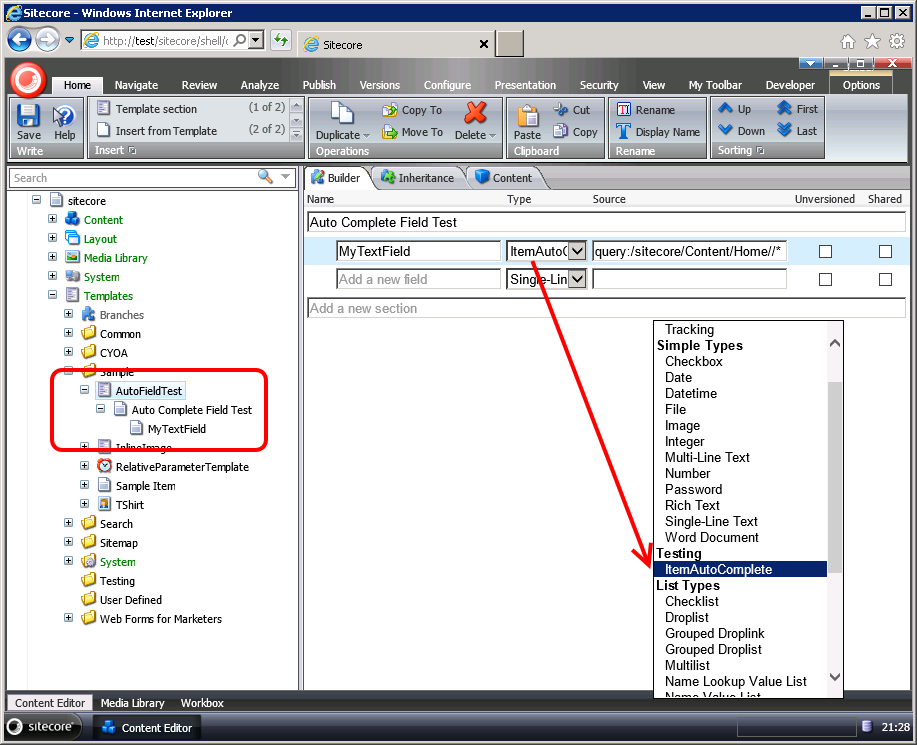
The new field type will appear on the drop-down list for Type now, and it can be used as the field type in the normal way. Later we'll look at the code for processing the Source parameter, but for the moment note that the Source is set to a query specifying the site of items we want to have in our auto-complete list.
So now we can create an item based on that template, and move on to the code.
url copied!
A little fiddling about with Reflector reveals that we can create a simple Property to access the data that the ContentEditor UI maintains about this field:
public string Source
{
    get { return base.GetViewStateString("Source"); }
    set { base.SetViewStateString("Source", value); }
}
If the UI Framework finds a property like this on your class it will write the Source data from the template at runtime.
Hence we can write a bit of code to process this data into a list of strings for our auto-complete script to process:
public string ItemID
{
    get { return base.GetViewStateString("ItemID"); }
    set { base.SetViewStateString("ItemID", value); }
}

public string ItemVersion
{
    get { return base.GetViewStateString("ItemVersion"); }
    set { base.SetViewStateString("ItemVersion", value); }
}

private IEnumerable<string> loadAutoCompleteItems()
{
    var master = Sitecore.Configuration.Factory.GetDatabase("master");
    var itemLanguage = Language.Parse(base.ItemLanguage);

    if (Source.StartsWith("query:", StringComparison.InvariantCultureIgnoreCase))
    {
        // run a query to get the parent folder
        string query = Source.Substring(6);

        Item[] queryItems;
        if (query.StartsWith("."))
        {
            var version = Sitecore.Data.Version.Parse(ItemVersion);
            var ctxItem = master.GetItem(ItemID, itemLanguage, version);
            queryItems = ctxItem.Axes.SelectItems(query);
        }
        else
        {
            queryItems = master.SelectItems(query);
        }

        return queryItems.Select(i => i.DisplayName);
        // what do we return if query errors or finds nothing?
    }
    else
    {
        Item srcItem = master.GetItem(Source, itemLanguage);
        return srcItem.Children.Select(i => i.DisplayName);
    }
}
I've added two extra properties for the class – ItemID and ItemVersion. The ContentEditor framework will fill these in with the unique ID and version identifer of the context item. We'll need that in a bit. Note that the base class here defines an equivalent property for ItemLanguage.
The code here will run with the
Sitecore.Context.Database
set to the Core database - so the first thing we need to do is get hold of a copy of the Master database for loading items. Then we parse the language so that we can use it for loading data later.
If the Source property starts with "query:" then we need to process the query in order to find the correct items. First we need to get rid of the query prefix. Then we need to load the correct language and version of the context item.
If the remainder of the query starts with a "." then it's a relative query. That means we need to run the query against the context item. So we parse the version data, and then load the correct version and language of the item that's specified as the current context item. We can then run the query against this item.
If it doesn't start with a "." then we run the query against the master database instead.
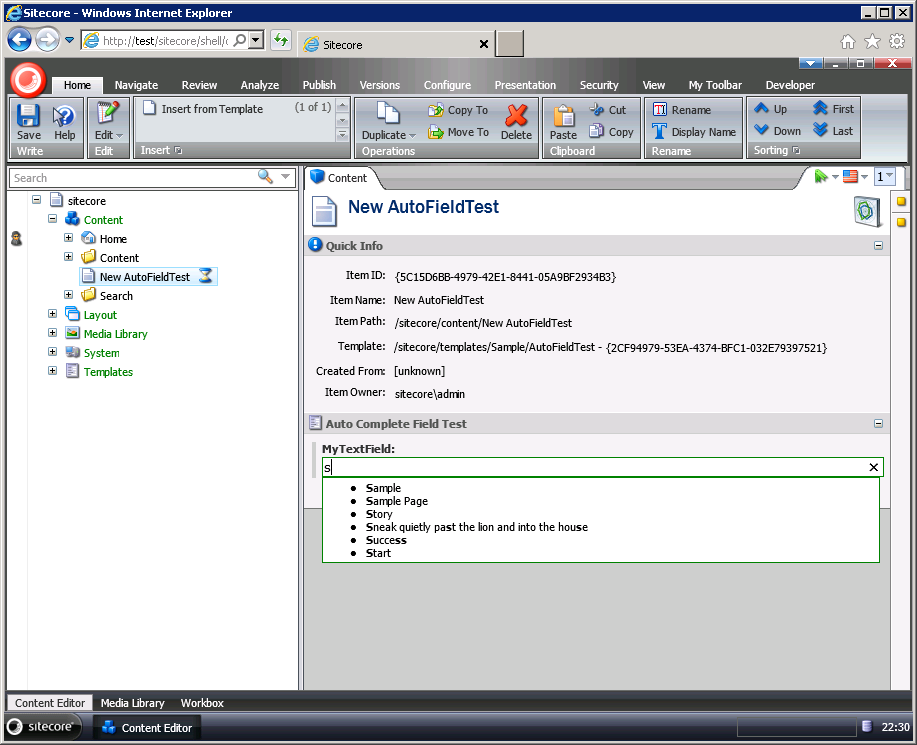
With that done, we can return the DisplayName of each item we found as the values for our auto-complete script.
If the Source property doesn't start with "query:" then we've got a standard path. We can load that item (ensuring we use the right Language) and the return the Display Names from all of that item's children.
url copied!
public class InjectAutoCompleteScript
{
    public void Process(PipelineArgs args)
    {
        if (!Context.ClientPage.IsEvent)
        {
            HttpContext current = HttpContext.Current;
            if (current != null)
            {
                Page handler = current.Handler as Page;
                if (handler != null)
                {
                    Assert.IsNotNull(handler.Header, "Content Editor <head> tag is missing runat='value'");
                    handler.Header.Controls.Add(new LiteralControl("<link rel='stylesheet' href='/sitecore/shell/Testing/Fields/ItemAutoCompleteField.css' />"));
                    handler.Header.Controls.Add(new LiteralControl("<script type='text/javascript' language='javascript' src='/sitecore/shell/Testing/Fields/autocomplete.min.js'></script>"));
                }
            }
        }
    }
}
This is also adding some extra CSS that we'll make use of later. This is based on the HTML that the auto-complete code adds as it runs:
.ac_input_Active
{
    border:1px solid green;
}

div.ac_results
{
   border: 1px solid green;
   padding: 3px;
   background-color: white;
}

div.ac_results ul
{
    margin-bottom: 0px;
    padding-bottom: 0px;
    margin-top: 0px;
    padding-top: 0px;
}

div.ac_results ul li
{
    cursor: pointer;
}
And we configure this with a config patch:
<?xml version="1.0" encoding="utf-8" ?>
<configuration xmlns:patch="http://www.sitecore.net/xmlconfig/">
  <sitecore>
    <pipelines>

      <renderContentEditor>
        <processor patch:before="*[1]" type="Testing.Fields.InjectAutoCompleteScript, Testing.Fields" />
      </renderContentEditor>

    </pipelines>
  </sitecore>
</configuration>
With that added in, the autocomplete script will be added to the page. For the purposes of this code I'm making use of an old jQuery plugin for auto-complete. (Yes, I know this has been superseded by jQuery UI – but there are reasons for keeping using this for my requirements – you're free to make use of the newer version) I've copied the minimised script for this into my project.
With that basic script in place, we need to attach it to our text editing field control. Based on the blog post above, we can put together some code:
private string findID(string attrs)
{
    string[] parts = attrs.Split(' ');

    string part = parts.Where(p  => p.StartsWith("id=",StringComparison.InvariantCultureIgnoreCase)).FirstOrDefault();

    if (part != null)
    {
        string[] segments = part.Split('=');
        return segments[1].Replace("\"", "");
    }
    else
    {
        return null;
    }
}

protected override void DoRender(System.Web.UI.HtmlTextWriter output)
{
    string id = findID(base.ControlAttributes);

    IEnumerable<string> items = loadAutoCompleteItems();

    output.Write(@" <script>
                        $sc(function () {

                            $sc('#" + id + @"').autocomplete(
                                ['" + String.Join("', '", items.ToArray()) + @"'],
                                {
                                    mustMatch: false
                                }
                            );

                        });
                    </script>");

    base.DoRender(output);
}
The
DoRender()
method of our class gets called by the Content Editor framework at runtime. The first thing it has to do is work out what the control ID for the text input field is. The base class keeps track of this, along with assorted other attributes of the input element in the
ControlAttributes
property. Hence we can pass this into the
findID()
method which parses it and extracts the correct ID.
Next we call
loadAutoCompleteItems()
to fetch the appropriate data.
Finally, before we call the base version of this method, we need to write a script block to bind the auto-complete script to the editor field. In the context of the Content Editor pages we need to use
$sc
to access jQuery. We define a startup function which finds the control with the ID we found above, and binds the auto-complete behaviour to it. Calling
autocomplete()
to make this binding requires two parameters. The first is the array of strings for our auto-complete data. The second is a set of option parameters that control how the code works.
Details of these can be found here.
url copied!
There's a fair bit more stuff that needs to be done to improve on this code and make it production-ready, however. It should really cope with fast queries, and it should also handle errors in a more effective way.
But it's a good start.
↑ Back to top
