Jeremy Davis
Jeremy Davis
Sitecore, C# and web development
Article printed from: https://blog.jermdavis.dev/posts/2016/putting-your-windows-user-data-on-a-different-drive

Putting your Windows user data on a different drive

Published 14 November 2016
Windows ~4 min. read

The other week I mentioned I'd suffered a hard drive failure on my laptop. Other than the git issues I wrote about last time, I had another issue that seemed worth writing up: How to get all of the user data for the rebuilt install on a separate drive to the programs and operating system. If that's something you might want to do with a Windows install then read on...

I've been using a machine running Windows Server Essentials as a home server for some time, and this manages the backup of my individual PCs. Something I realised with the recent hard disk failure was that it's rare that I'd want to restore the whole drive. The reality is that I usually want to re-install the O/S and applications to a blank drive, and then restore only my data files and some settings from backups. Hence using Windows Server Essentials to back up the entire drive is largely wasting disk space and making the backups take much longer than necessary.

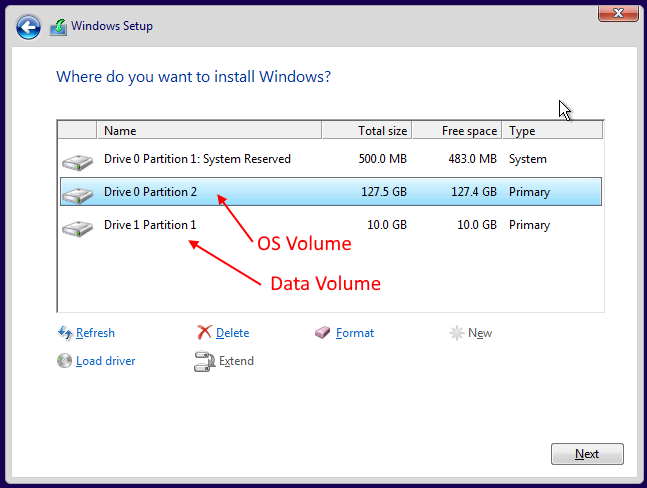
So I started researching how I could configure my rebuilt machine to get my user data onto a separate volume, and back up only that bit.

The simple, but incomplete approach

You can move many of your user folders about via the Windows UI. For example, if you right-click your "Documents" folder you can adjust the path via the "Location" tab:

Moving Documents

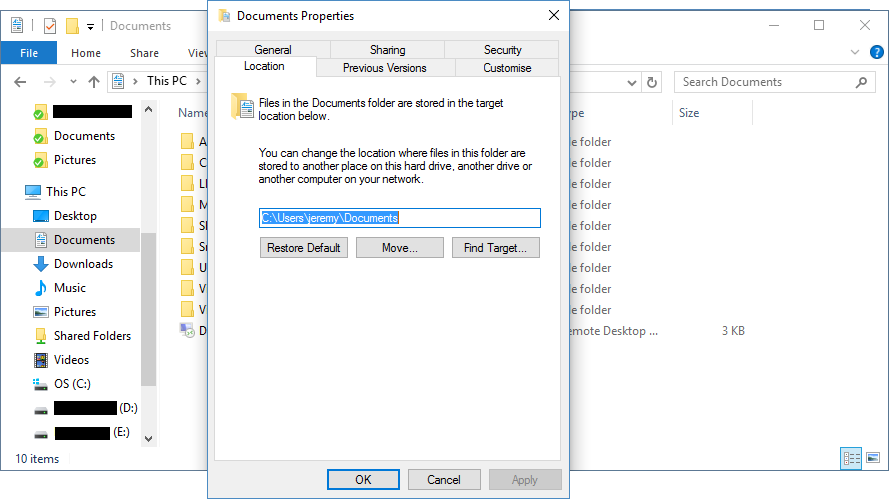
While this is easy, it's not that great a solution. Firstly, it doesn't address any of the settings and data stored in any of the hidden folders that Windows keeps under your Users folder. You're moving some of the child folders of your User folder, but nowhere near all of them. Also some (poorly written) applications which make assumptions about where these folders are supposed to live won't respect the settings here, and will keep writing to the old location anyway.

So what else can we do?

The more complex approach

If you're prepared to sort this out when you're in the process of installing Windows, then you can do better than the simple approach. After spending some time with Google, I came across an article describing how to physically move all of the "Users" folder, and then fool Windows into thinking it was still in the right place using directory junctions. The process I tried came from this article, however I found that the precise approach described there didn't work for me. Here's what I did instead:

  • Run the first stage of the Windows Installer from your CD or USB Key
  • When you get to the "Which type of installation do you want?" question, use the "Custom Install" option. If you have a single physical drive then you'll need to create (at least) two partitions and format them. Ideally create the O/S volume first and the user data one second. If you are using multiple physical drives then just format them. Then ask Windows to install onto the one you want to be your O/S volume. That will look something like: Choose Volume
  • When you get to the first reboot of the installation, make sure your machine boots the Windows Installer media again (from CD or USB) instead of the O/S volume.
  • When the first installer dialog reappears press Shift-F10 to bring up a command prompt.
  • Work out the drive letters Windows has assigned for your O/S and data volumes. These will probably not be the letters you expect normally. In my case I had "E:" as the O/S volume and "D:" as my data volume. Yours may be different - if so, you will need to replace the drive letters in the following commands appropriately.
  • Copy the Users folder from the O/S volume to the data volume. The command below will copy a collection of files and folders. It may report a small number of "could not copy" errors for some folders - that doesn't seem to be an issue. 
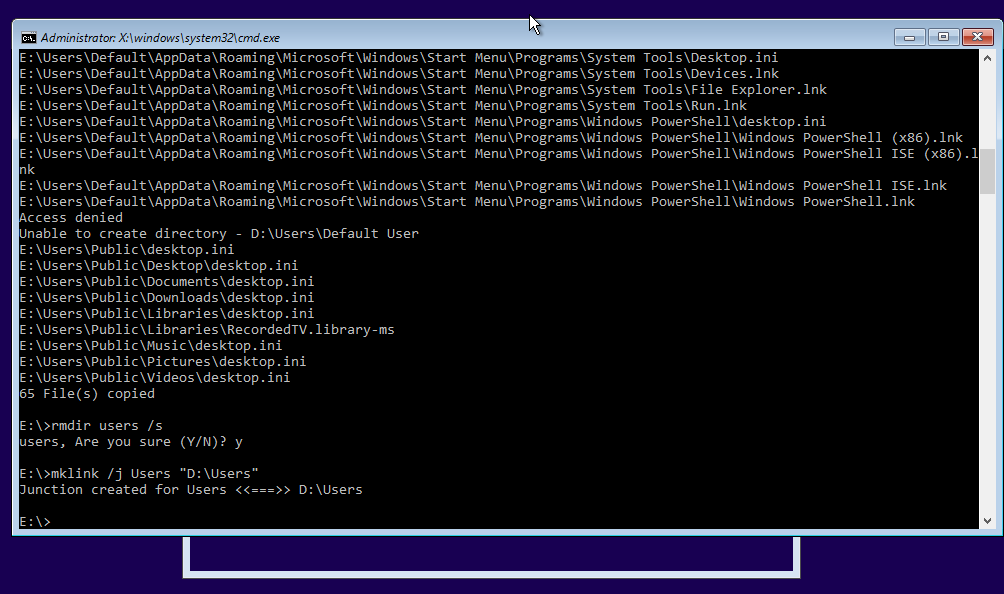
xcopy "E:\Users" "D:\Users" /e /i /h /k /y /c
  • Then remove the O/S volume's copy of this folder: rmdir "E:Users" /s
  • Finally replace the folder you just deleted with a link to the folder you copied onto the data volume: mklink /j Users "D:\Users Those three commands should end up looking something like: Manual Commands
  • Reboot your machine, and allow the installation process to continue by booting the O/S volume.

If all goes well, the installation should now complete (after you've answered a few more questions) and Windows should run fine. When you look at Explorer you should see something like:
Result
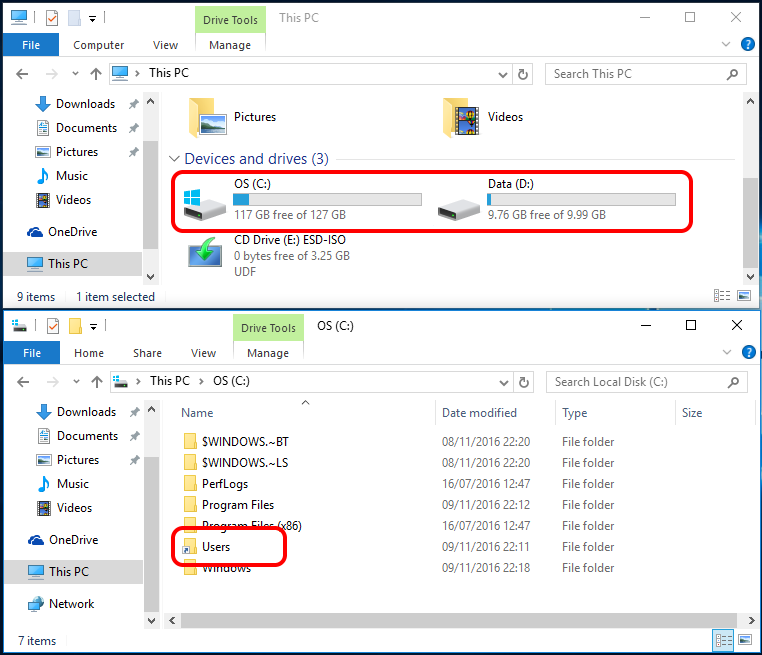
Note how the Users folder here has a "this is a link" icon overlay, showing what we've done.

And with that sorted out, I can now tell the Windows Server Essentials connector software to back up the E: drive only, so just my files and settings are copied.

One wrinkle...

I did find one scenario where the steps above don't work quite so easily. That is where the drive letter of your data volume gets changed between you creating the link above, and the installer continuing after rebooting. This seems to happen in some scenarios where the installer sorts the volumes differently to Windows itself – specifically for me it happened on a laptop which had an MSATA SSD and a SATA HDD. The installer sorted the volumes on the MSATA drive before those attached to the SATA drive, but when Windows was running it put them the other way around. If this happens to you, it will cause the installer to put up an error dialog and stop because trying to write to the fake \Users directory junction will fail.

Should you see this error, you can use Shift-F10 to get the command prompt back, and adjust the link. Use rmdir Users to remove the incorrect directory junction record. Then repeat the mklink /j command to point a new link to the correct drive letter. Rebooting again should allow the windows installer to complete.

If you're worried about getting this process right (or you just want to practice), you can test it out in a virtual machine.

↑ Back to top