
Jeremy Davis
Sitecore, C# and web development
A while back, work moved from having a traditional domain-joined laptops and an on-site Domain Controller for our Active Directory to the more modern SaaS model of cloud domain. Mostly this doesn't matter at all to employees as they work. But I bumped into one place where I do need to do something different because of this: setting explict disk permissions. So as a reminder to myself for next time, here's how to achieve this.
 url copied!
Back when we had a traditional domain, if I wanted to set disk permissions on a folder for my company user account it was fairly simple. Open the permissions dialog, select "Add" and make sure the "Location" button is used to pick the office domain the user was part of:
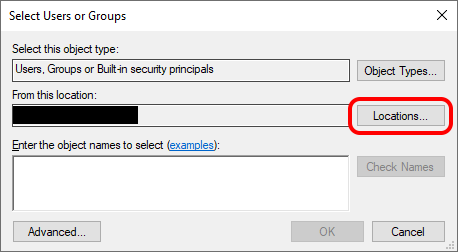
Then when I typed my username into the "Object Name" box, it would work correctly.
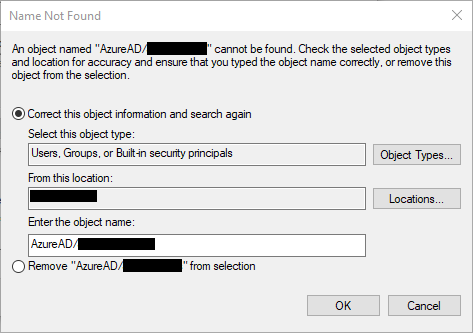
But in the new cloud-only world, where our laptops are no longer joined to a domain, I can't see the cloud domain in the "Location" dialog - so it doesn't seem possible to add my cloud user. Trying to add it gives the "that user wasn't found" dialog even if you specify the correct cloud domain with the user name:
url copied!
It turns out this is one of those annoying places where the UI does not seem to have kept up with changes to how we're using the Windows ecosystem. So you can't pick the user via the UI - but you can add the user via the command line.
The command required here is
icacls.exe, and you can use it to grant security rights for a folder and its children.
/t
recurses into folders.
/grant
adds a new right. And the username is specified with
AzureAD
as the domain, the appropriate username, and
:M
to specify the "modify" right I needed:
icacls "C:\YourFolderToModify" /t /grant "AzureAD\TheUserName:M"
And that little bit of command-line wizardry solves my problem.
More details of
icacls.exe
and what you can do with it are
available in documentation.

