
Jeremy Davis
Sitecore, C# and web development
It's not an uncommon requirement to have a control on your website which displays its data with varying styles in different locations in the site. Here are a few simple patterns for how you can create Sitecore UI components which can have their display style changed by location.
 url copied!
For example, in your markup for a layout (or parent sublayout) you could write:
<div class="layout">
    <div class="leftColumn">
        <sc:Placeholder runat="server" key="left"/>
    </div>
    <div class="rightColumn">
        <sc:placeholder runat="server" key="left" />
    </div>
</div>
And then the UI control itself might include:
<div class="myControl">
    <!-- control markup here -->
</div>
And then in your CSS you can have something like:
.leftColumn .myControl {
    border: 2px solid red;
}

.rightColumn .myControl {
    border: 2px solid green;
}
By writing CSS selectors that check if the control is placed into the left or right column, the display of the control can vary depending on which placeholder it's put in. So by carefully separating out the CSS for your control into "stuff that needs to vary" and "stuff that's the same in all places" you can keep the extra CSS as small as possible.
url copied!
You could put the following markup in your user control:
<%@ Control Language="C#" AutoEventWireup="true" CodeBehind="TuesdayControl.ascx.cs" Inherits="Testing.TuesdayControl" %>
<div runat="server" id="container">
    <!-- markup goes here -->
</div>
and then add some code-behind:
public partial class TuesdayControl : System.Web.UI.UserControl
{
    protected void Page_Load(object sender, EventArgs e)
    {
        if(DateTime.Now.DayOfWeek == DayOfWeek.Tuesday)
        {
            container.Attributes.Add("class", "tuesday");
        }
    }
}
and again, add some CSS to your solution to adjust the colour when the "tuesday" class is applied.
url copied!
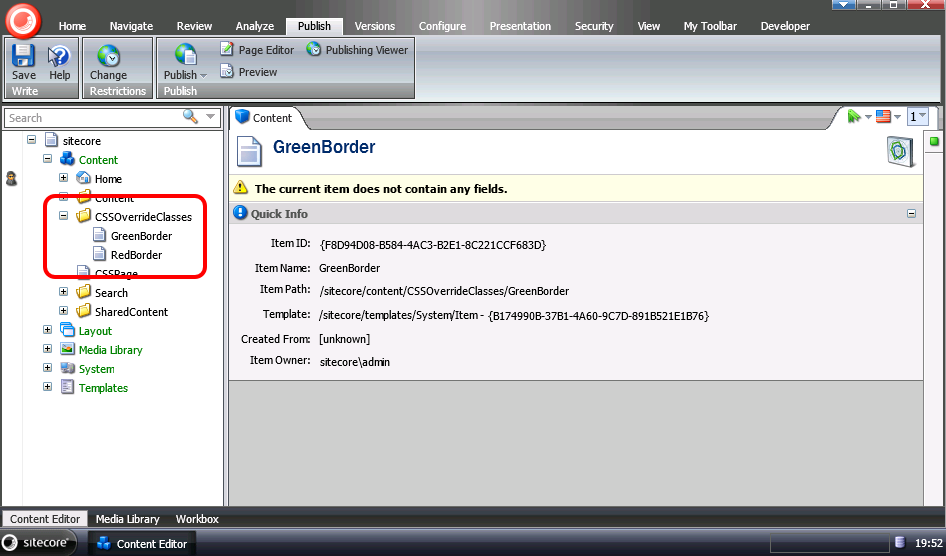
First of all you need some items to represent the possible CSS classes. These can be based on the
Item
template, since all we need is their name. Add a folder somewhere in your content tree (your "shared content" area is usually a good place) and create items with the names of the CSS classes you want editors to be able to apply:
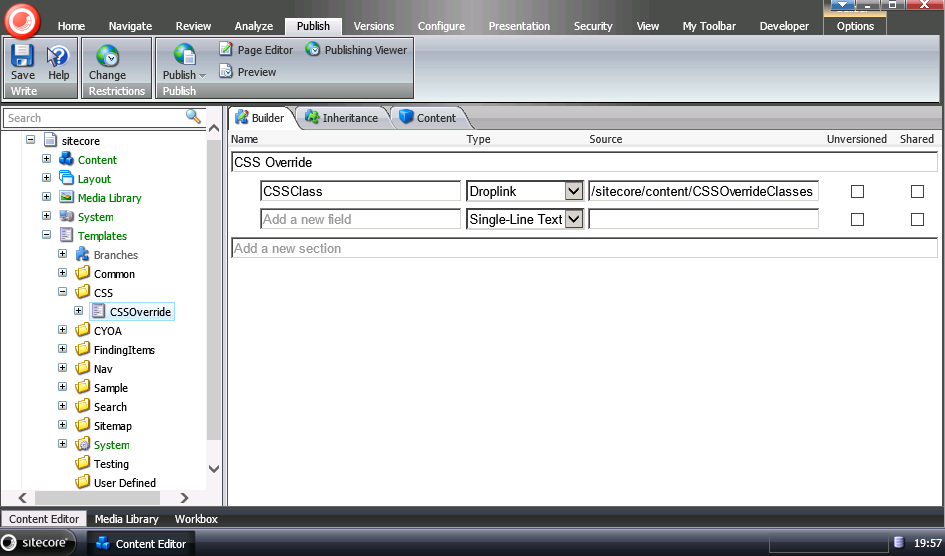
Then you can create a new
Rendering Parameters Template
that lets the editor pick their choice of item. Create a new template, but set the base template that it inherits from to
/sitecore/templates/System/Layout/Rendering Parameters/Standard Rendering Parameters. And then add a single field to store the user's choice of CSS class:
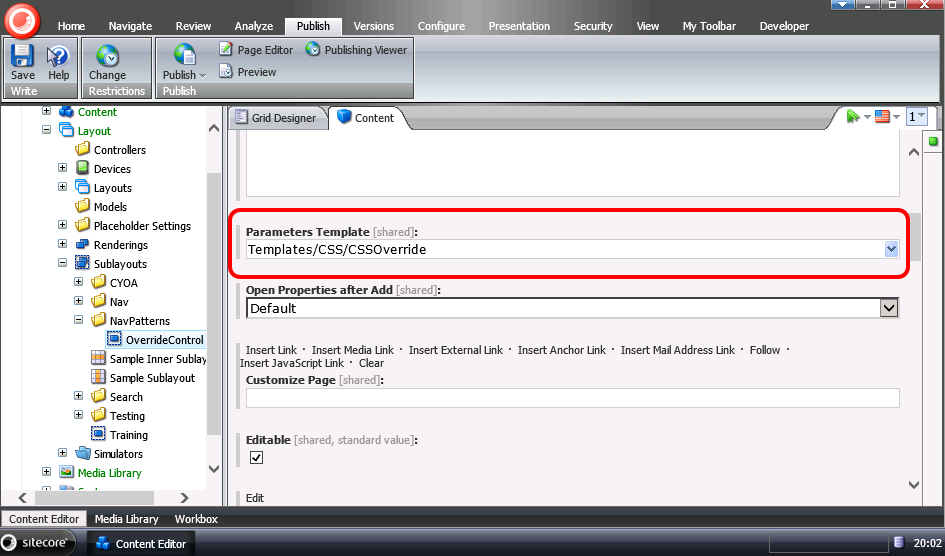
Next, you need to bind this new parameter template to the Sublayout that's going to render the extra CSS class. Find the appropriate sublayout definition in the content tree, and use the "Parameters Template" field to pick your new parameter template:
The code for your sublayout needs to be able to process this data now. As in the previous example, you'll need some sort of element to receive the CSS class. Something like:
<div runat="server" id="container">
    <h2>Control with CSS override</h2>
    <!-- your markup here -->
</div>
And then in your code-behind, you can apply the CSS override class:
protected void Page_Load(object sender, EventArgs e)
{
    ApplyCSSOverride(container);
}

public void ApplyCSSOverride(HtmlGenericControl ctrl)
{
    var sublayout = (Sitecore.Web.UI.WebControls.Sublayout)this.Parent;
    var layoutParameters = System.Web.HttpUtility.ParseQueryString(sublayout.Parameters);

    string classid = layoutParameters["CSSClass"];
    if (!String.IsNullOrWhiteSpace(classid))
    {
        Sitecore.Data.ID id;
        if (Sitecore.Data.ID.TryParse(classid, out id))
        {
            Item item = Sitecore.Context.Database.GetItem(new Sitecore.Data.ID(classid));

            if (item != null)
            {
                if (string.IsNullOrWhiteSpace(ctrl.Attributes["class"]))
                {
                    ctrl.Attributes.Add("class", item.Name);
                }
                else
                {
                    ctrl.Attributes["class"] += " " + item.Name;
                }
            }
        }
    }
}
The
ApplyCSSOverride()
method takes the control you want to apply the override to as its parameter. It then finds the Sitecore
Sublayout
control that's containing this code, and parses its layout parameters into a set of name/value pairs. If the collection contains a value for "CSSClass" (the name we gave the field in our Parameter Template) then we can process this – otherwise there's nothing else to do. That property will contain the ID of the chosen CSS Override item, so after trying to parse/load it, if we have an item we can use its name as a CSS class to apply to our control. Here we're also checking if that control already has any classes applied to it. If not, we add the appropriate HTML attribute. Otherwise we append our class name to the pre-existing attribute.
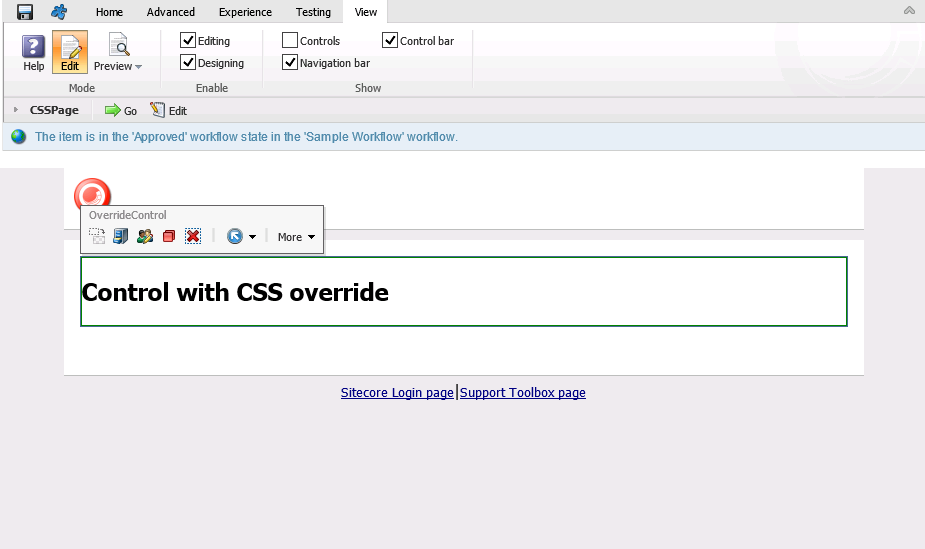
With that code in place, you can put your sublayout onto a page, and then choose a CSS class from the Component Properties:
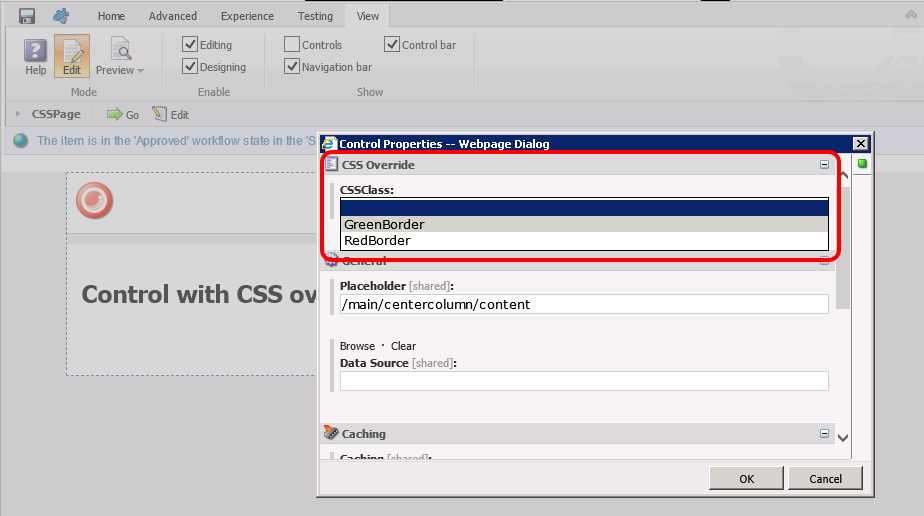
And your sublayout will add the appropriate style:
In more complex scenarios, you might make the Parameter Template allow multiple selection for the override classes.
(All these techniques can work for MVC-based sites too, if you adapt the code)
↑ Back to top
