
Jeremy Davis
Sitecore, C# and web development
Last time out I was looking at scripting installs of Solr using plain old PowerShell. Since the Sitecore world is getting to grips with a new PowerShell based install approach with the Sitecore Install Framework (SIF), it seemed like a sensible idea to try porting my ideas to SIF so see how that would work...
 url copied!
url copied!
url copied!
C:\Users\<user>\Documents\WindowsPowerShell\Modules;C:\Program Files\WindowsPowerShell\Modules;C:\WINDOWS\system32\WindowsPowerShell\v1.0\Modules;C:\Program Files (x86)\Microsoft SQL Server\130\Tools\PowerShell\Modules\
For development purposes, I went for
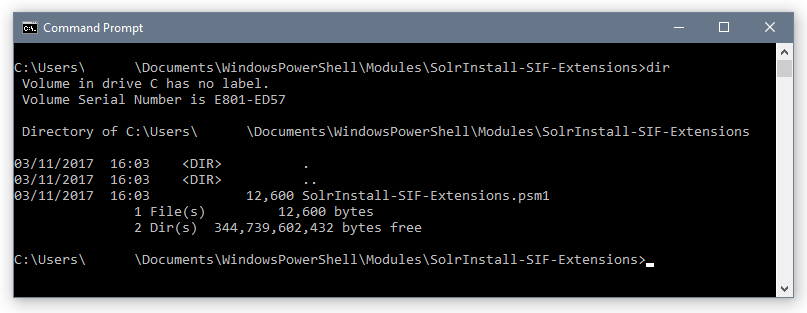
%UserProfile%\Documents\WindowsPowerShell\Modules. I named my module "SolrInstal-SIF-Extensions", so I created a folder with that name in the module directory, and then put the module file into that:
Inside that file, you need three things:
The commandlets are just normal PowerShell functions with the following structure:
function AllowedVerb-YourChosenNameTask
{
    [CmdletBinding(SupportsShouldProcess=$true)]
    param(
        # Whatever set of mandartory and optional parameters you need
    )

    PROCESS
    {
        # Your code...
    }
}
The
CmdletBinding
attribute is important - that allows the code to support the
-WhatIf
parameter - which is very useful for verifying what a script will do without changing any state.
Initially,
I got the registration stuff a bit wrong, but it turns out that as long as you put these statements into your module file, it's pretty simple. These statements just map the full name of your commandlets into a shortened names to use in the
.json
file later on:
Register-SitecoreInstallExtension -Command AllowedVerb-YourChosenNameTask -As YourChosenName -Type Task
In terms of the overall commandlet code, it's mostly just refactoring last week's work into a set of commandlets that seemed to make sense from the SIF perspective. The only significant change is that now the code uses SIF's
Write-TaskInfo
commandlet to report its status, and it's been modified a bit to support
-WhatIf. All that means is that statements which actually change the state of your system have been wrapped in a block of code like this:
if($pscmdlet.ShouldProcess("RelevantData", "DescriptionOfWhatWillBeDoneWithTheData"))
{
    # Code goes here...
}
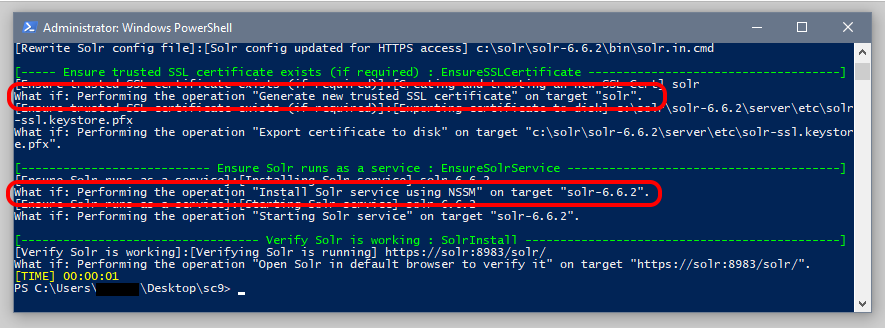
If the user specifies the
-WhatIf
flag then the statements inside this block are not run, but a log message is generated from the data and description passed it. So you can see what it would do, without it actually doing stuff:
The test for "is the session elevated?" that last week's script contained isn't relevant any more, since SIF needs to run in an elevated PowerShell window. However you do get a slightly confusing error message if you forget to click "Run as administrator" to start it up:
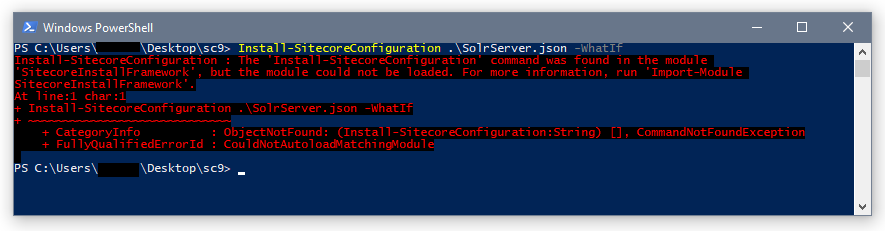
If you follow the instructions, you'll get a message about how the scripts require elevation – but it's not entirely clear from the message you see initially...
The full script for the module is available in a Gist.
url copied!
Get-Content YourFileNameHere.json | ConvertFrom-Json
SIF's errors sometimes hide some useful bits of the parsing error detail from you – but this command will let you see what PowerShell thinks of your json file. You'll either see a PowerShell object (which implies successful parsing) or a parser error message. The errors aren't always helpful about the location of the problem in your file, but they generally tell you give you a hint about what sort of parsing error occurred.
So what needs to go in the json file?
The first section is for declaring parameters. These are the bits of data that might vary between each install. This is pretty similar to the set of script parameters declared for the plain PowerShell last time. For each one you declare a name, a type, a default value and a description:
"Parameters" : {
    "JREVersion": {
        "Type": "string",
        "DefaultValue": "1.8.0_151",
        "Description": "What version of the Java Runtime should "
    }
}
One thing that caught me out here was that you're declaring json data – so if you want a boolean value, you use the Javascript
true
rather than the PowerShell
$true.
Next, you need to say if you're using any extra modules to extend SIF:
"Modules" : [
    "SolrInstall-SIF-Extensions.psm1"
]
You don't need to specify a path, as SIF assumes your extensions are stored in a module folder, as described above.
You can then declare variables. These are bits of data your commandlets need which are computed from parameters or other values that SIF has access to. Hence they're declared as a map from variable name to an expression that can be used to calculate them:
"Variables" : {
    "NSSMSourcePackage": "[concat('https://nssm.cc/release/nssm-', parameter('NSSMVersion'), '.zip')]"
}
These are most useful where more than one commandlet requires access to a computed value – rather than having to pass lots of parameters and do the computation on multiple places, you can do it once and pass the result...
Finally there's the task declaration. This sets out the steps your SIF script needs to take, what commandlet will perform the step, and what data to pass in. For example:
"Tasks" : {
    "Ensure NSSM is installed": {
        "Type": "EnsureNSSM",
        "Params": {
            "downloadFolder":    "[parameter('DownloadFolder')]",
            "nssmVersion":       "[parameter('NSSMVersion')]",
            "installFolder":     "[parameter('InstallFolder')]",
            "nssmSourcePackage": "[variable('NSSMSourcePackage')]"
        }
    }
}
The type referrs back to the
-As
parameter you gave to the
Register-SitecoreInstallExtension
statements in your module declaration. The params are the names of the commandlet parameters, mapped to the value you need to pass in.
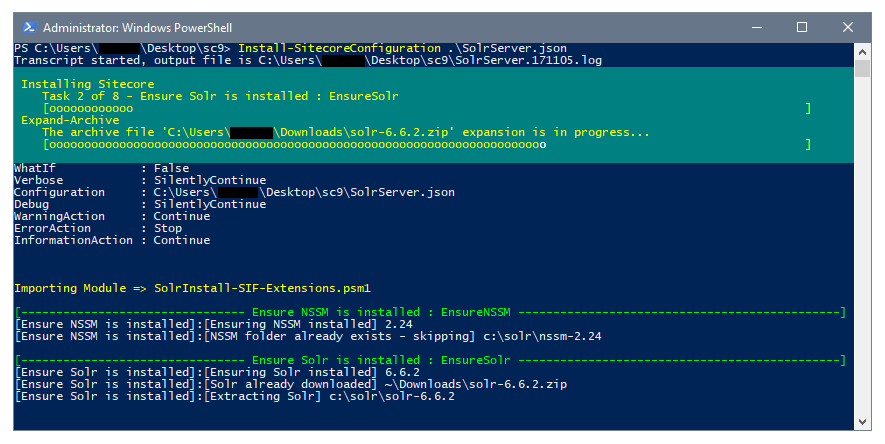
SIF will then run each of your tasks in turn, and display the result for you:
There's plenty more detail about what all of this means in Sitecore's documentation for SIF – it's well worth a read to familiarise yourself with everything that's going on.
The complete data is available in the Gist for this.
url copied!

