
Jeremy Davis
Sitecore, C# and web development
After I presented at a couple of user groups recently, some people asked me about how I organised the video demos in my deck. It's a question I've been asked a few times over the years, so I figured this might be a good time to answer it...
If you've seen me speak before, you'll have noticed that I tend not to do live demos with my presentations. I know some people frown on this, but it works for me for two reasons:
First: It helps me stick to time and keep interest: I never have to have those annoying "Sitecore takes an age to reload" pauses in my talks.
And
Second: My brain just can't do talking and typing at the same time – and I don't like being silent while I run some code. So my tactic for demos over the years has been to practice them, and then record them as video. That lets me edit out the pauses and ensure my talking fits around the action on screen well.
It's a fair amount of work to do this – but I think it can give pretty good results. So what is the process then?
 url copied!
I tend to rough out the code or config I need, work out any changes and processes I want to demo, and run through it a few times to refine exactly I want. I'll get the appropriate bits committed to a git repository while I'm working. And once I'm happy with the flow I tend to do a bit of polishing, to try and make things look nicer. Git is very helpful for reverting state – so you can make use of it to reset your demo back to the beginning without fuss.
url copied!
I tend to repeat this bit quite a few times, and update the plan for the demo as I do it, while I try to refine the wording to make sure it's clear.
url copied!
That approach has two key advantages. First it keeps the processing work necessary to run Sitecore / Solr / SQL Server etc separate from the work of capturing and saving the video. And secondly it lets me pick the screen resolution I want to record at separate from the native resolution of the monitor I'm working on. I've tended to record at 1440×900 in the past. Most presentations are "widescreen" these days, so that's a decent balance of resolution vs file size. I've used mRemoteNG to do the RDPing, as it puts a helpful border around windows smaller than the desktop.
I've used two local computers, as well as a local computer for the recording and Azure VMs to run the demo. Both approaches seem to work fine.
And I invariably find myself repeating the recording step a number of times, when I get things wrong. Because it's surprisingly hard to do a sequence of things correctly when you know you're being recorded 😉 Writing down the steps helps. And don't forget that you can leave little pauses while you read your notes between steps – they can easily be edited out later. Though remember that keeping the mouse still (or off screen) will make that editing easier.
I've found that setting up the desktop of the user you're recording as can help reduce hassle here. Make the screen you're recording as simple as possible (outside of the demo itself) to focus attention and to make it easier to edit. I turn off most of the things in the system tray (Especially the clock! Otherwise people can see where you edited!) the network and volume icons etc. I'll remove most of the pinned stuff from the taskbar. And turn off the screensaver – otherwise you can bet it will kick in whenever you're recording something long running... You'll also want to do things like set a sensible zoom level on your browser, and turn up font sizes in your text editor / dev tools.
You'll also want to stop any software from popping up notifications – having someone dial you on Skype while you're recording is really irritating. I find turning on "Presentation mode" in Windows saves a lot of hassle with this – it prevents notification popups with the least effort. Press Windows-X, pick "Mobility Centre", and click the little projector icon to get to settings:
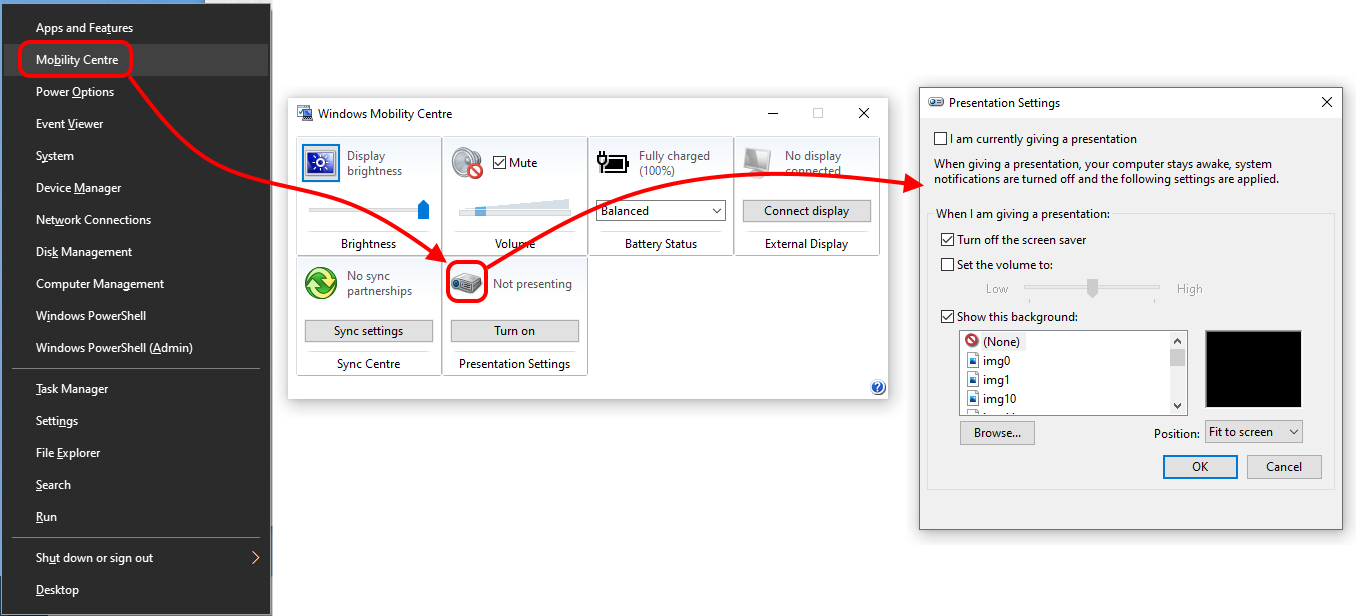
One you've set what you need, accept the settings and click the "Turn on" button above "Presentation settings". Scott Hanselman wrote a helpful post on "setting up your desktop for screen recording" recently – that's a good reference for this aspect.
I don't record audio with my demos – I've never hit a situation where I would need the sound from the machine I'm recording. So I tend to configure my screen recorder to not record audio at all. That reduces file sizes for the raw recordings a bit – and the overall lack of sound makes editing easer, as it means I don't have to worry about what effect my edits have on the sound.
To do the recordings I have used two bits of software. Historically I've used SnagIt for all the recording. It has a convenient "only record a particular bit of my desktop" feature that snaps to the underlying Windows Controls. That makes recording just my RDP window at the right size easy. However I've found the recent releases of SnagIt have some significant bugs around audio on my laptop. Trying to record with no audio often leads to a crash caused by it not being able to connect to an audio stream. I can make it work – but it's more of a faff. So I've been experimenting with using Open Broadcaster instead. This is great for "I want tor record my presentation for YouTube" as it works really easily for recording full screens, overlaying webcams and the like. But it's less useful for recording demo fragments.
url copied!
The first editing task is to get rid of any start / finish delay or messing about around the recording, and then I'll break up the file(s) roughly by the set of slides I'm planning to have. From there, the bit of recording for each slide needs editing to fit into the right time slot.
Sometimes getting that timing adjustment is easy – just changing the playback rate a bit to make it go faster. But with some bits of recording it's trickier. The really slow startup times of some versions of Sitecore can be a bit tricky here. Photoshop only lets you run playback at four-times speed – so if you're starting up Sitecore plus xConnect on a not-very-beefy computer then even running at four-times speed, it'll still be too long.
You can tackle this in one of two ways, I think. The "simple" way is just to edit out all the delay in one block. You either end up with a "jump" on screen (which may or may not look odd) or you can overlay some sort of "time passes" icon / image or meme to make it obvious what you've done. The more complex way is that if you can take out a certain percentage of the time, but leave the overall flow. That involves snipping the recording into even chunks (the length will depend on how big an edit you're making, probably) and then delete every X of these chunks. So to get rid of 30% you might delete every third segment of your snipped up bit of recording. This is more time-consuming to do, but it has the effect of making the process look like it goes faster, rather than just getting skipped over. Progress bars still animate, for example – just much faster.
The other thing you can do to speed up segments is just to snip out any bits where the screen doesn't change at all – pauses between steps for example. Again, it's a bit of hassle to do, because you need to make fairly careful edits. But it's the easiest way to get rid of pauses where nothing of interest is happening.
In any given recording I'll probably use all three of these techniques – I find they're appropriate for different bits.
Overall, my goal here is to balance the length of the demo against whatever talking I want to do while it happens. Usually that means shortening a demo segment, because it would take longer than the talking. But this also affects how I choose to break the demo into multiple slides. I rarely have the demo as a single video – it's usually many shorter videos. A particular slide will have some video where I talk – and then that video may end while I keep talking – before I move to the next slide to start the animation playing again. That ensures that the movement always starts up again at exactly the right time. I found it too hard to do this by having one video with pauses in it – that's too sensitive to how fast I speak, or whether someone asks a question.
All this editing does tend to lead to complex timelines...
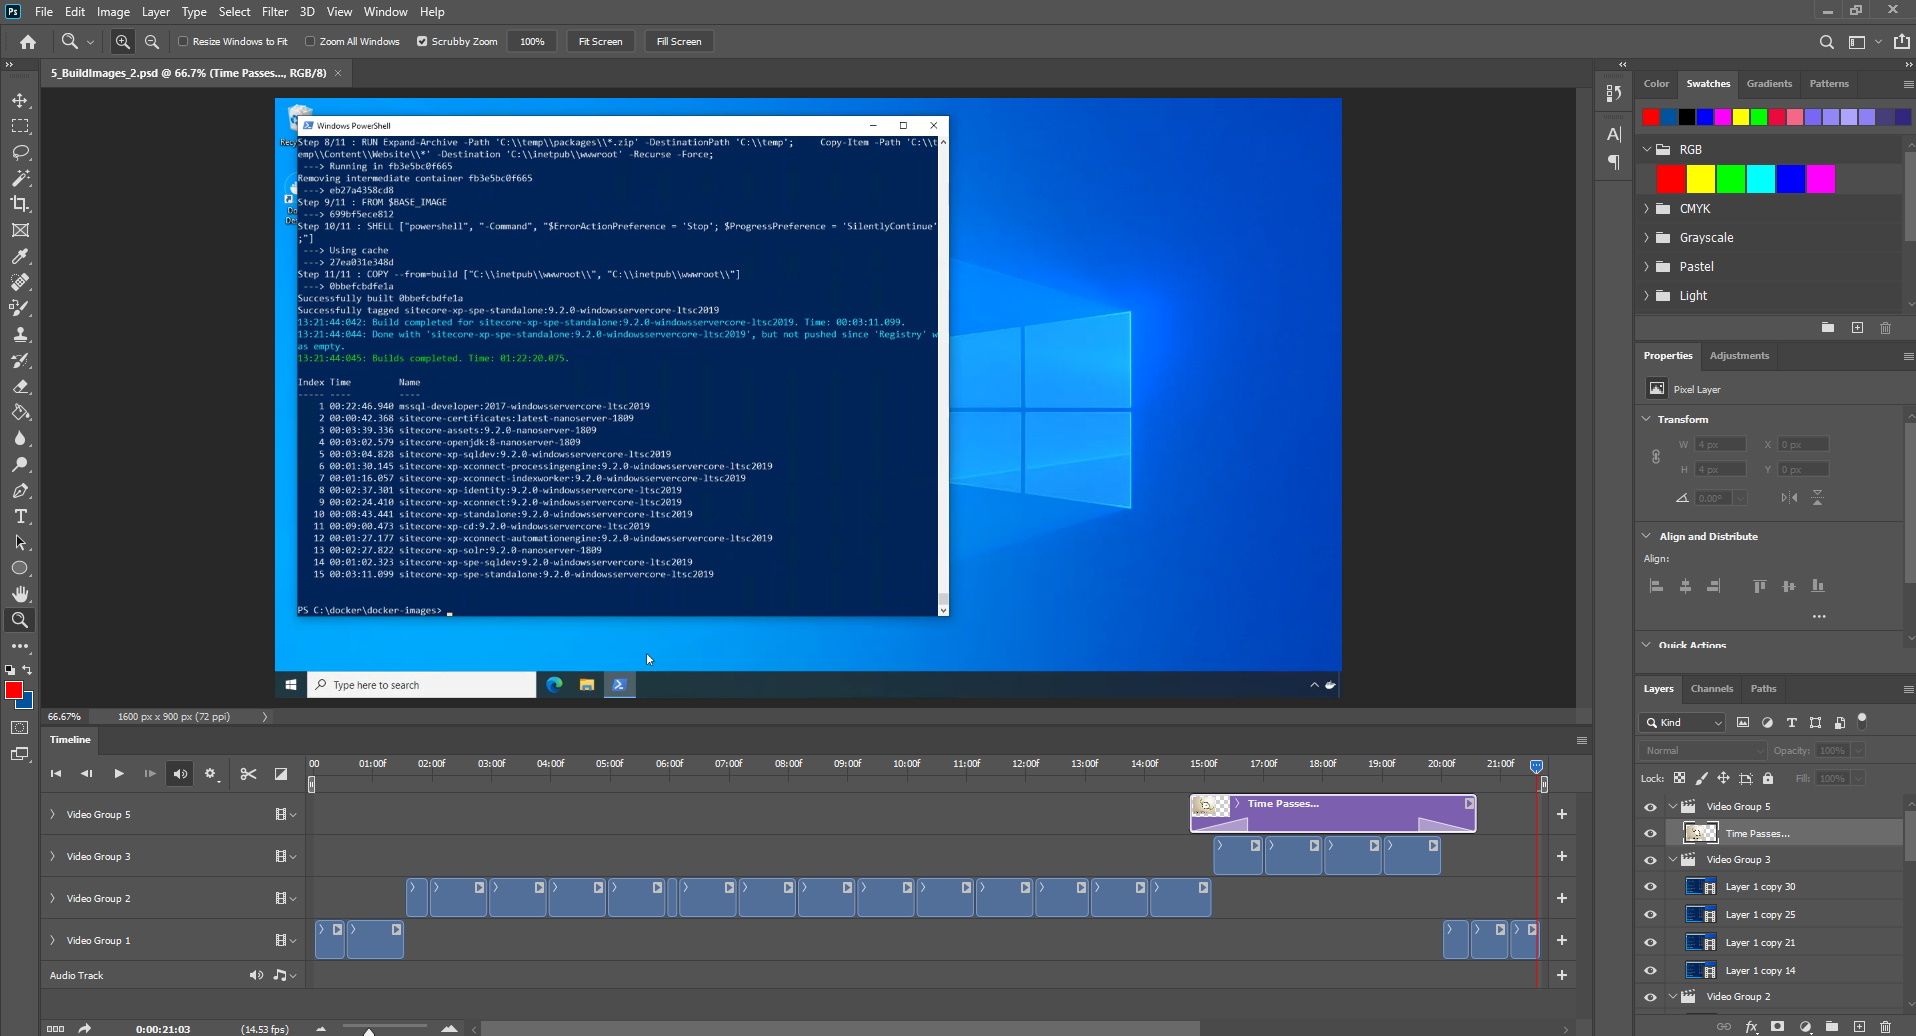
It's worth noting that I will also keep the Photoshop files for each chunk of video, as well as the raw original recordings. Chances are I will have to come back and tweak them later on – so being able to reload these files is helpful.
url copied!
These then get dragged onto their slides in PowerPoint, and scaled to maximise them on the slide. (The size of the recording was the same aspect ratio as the deck – so they scale easily) Each bit of video then needs to be configured to auto-play when the slide is shown.
Sometimes I have places in my deck where I stop the video in order to talk and draw boxes or arrows on top of the image to highlight important stuff like "which button to click" or similar. For these I tend to go to Photoshop and export the appropriate image as a PNG. And then I'll use PowerPoint's drawing features to put the arrows and boxes on top of this image. I find that works better than drawing the boxes in Photoshop – and it allows you to use builds or animations on your annotations easily.
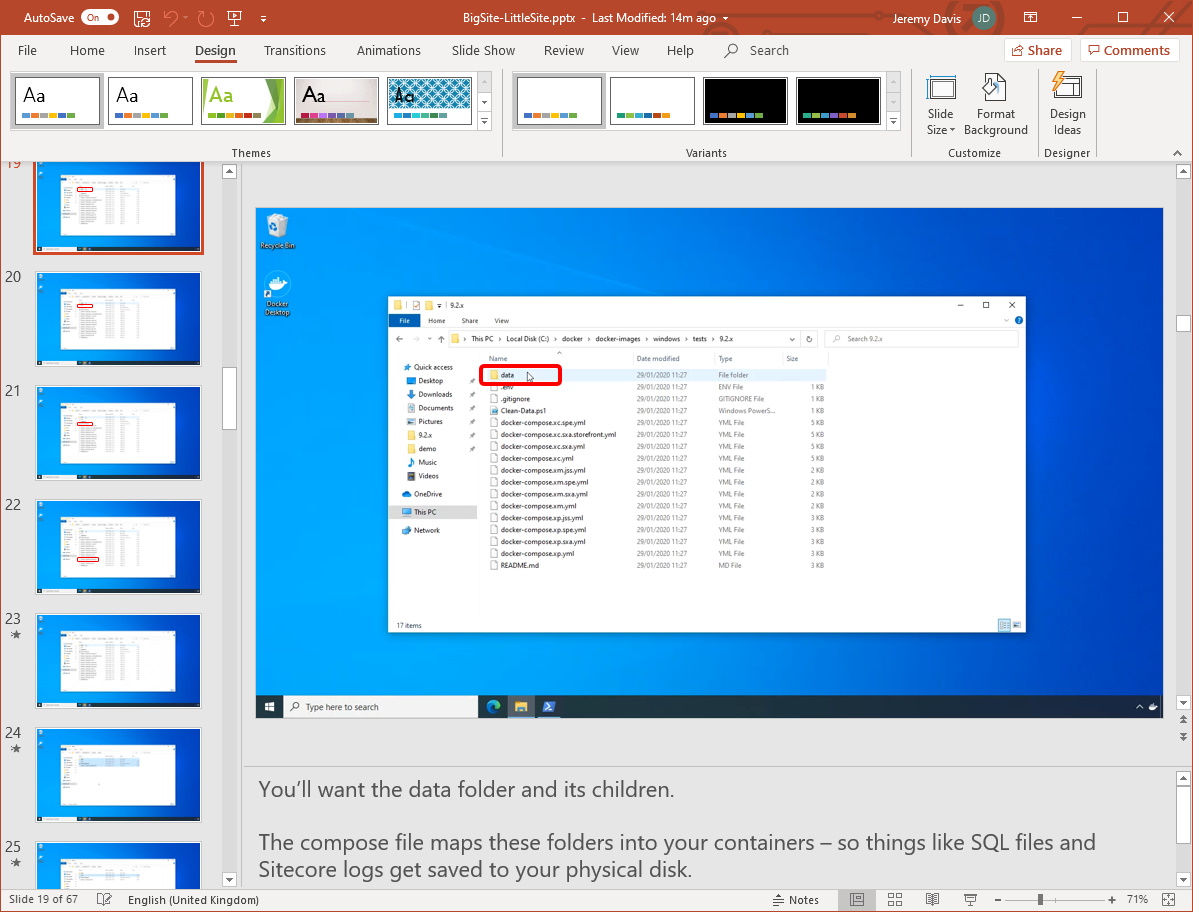
It does tend to lead to having a lot of slides though:
At the end of this phase the deck will be ready to test out – but it will also be pretty big now. I find mine tend to end up in the 200-300MB range. One thing I've noticed is that Office really does not cope with you saving a deck that big onto OneDrive. I've had all sorts of issues with it getting confused and failing to upload my changes, or PowerPoint hanging because the save takes too long. Because of that I will save my deck on my (fast) local hard drive, and then copy it to OneDrive at the end of each editing session. That means I get to have it available to download from the cloud, but I don't have to put up with the quirks of saving very big files in that way from PowerPoint.
url copied!
Once all the slides are in the deck, I'll run through it a few times. I'll make notes about where the timing doesn't seem to work, or where the words don't quite match the images on screen. Plus I'll be thinking about how the demo fits to time. Based on that I'll make edits to the text, and I'll tweak the videos, or other bits of the slides as well.
And once I'm happy with the overall timing, structure and content, all that's left is lots of practice...
↑ Back to top
