
Jeremy Davis
Sitecore, C# and web development
This is post 1 of 2 in a series titled Some notes on Content Hub Product Content Management
- Customising product data in Content Hub
- Querying product data and images in Content Hub
Content Hub is a product I don't get to use too often, so I find myself digging about a bit to remember the details of some customisation and setup. So having had to do some investigations into how to customise the Product Content Management features recently I figured both myself and search engines might benefit from some notes on the subject for the future. And maybe you will too...
 url copied!
Say you want to manage product data in Content Hub using its PCM feature. You want to customise the system to store some extra data relevant to your business, and you need the UI to display those custom fields too. (Later you'll likely need to be able to query this data via GraphQL - buy we'll get to that in a future post) So what are the core tasks required to achieve the custom schema?
url copied!
All the data you manage in Content Hub derives from the underlying
Entity
data type - which is basically the equivalent of
Item
for this bit of software. Product data uses the
M.PCM.Product
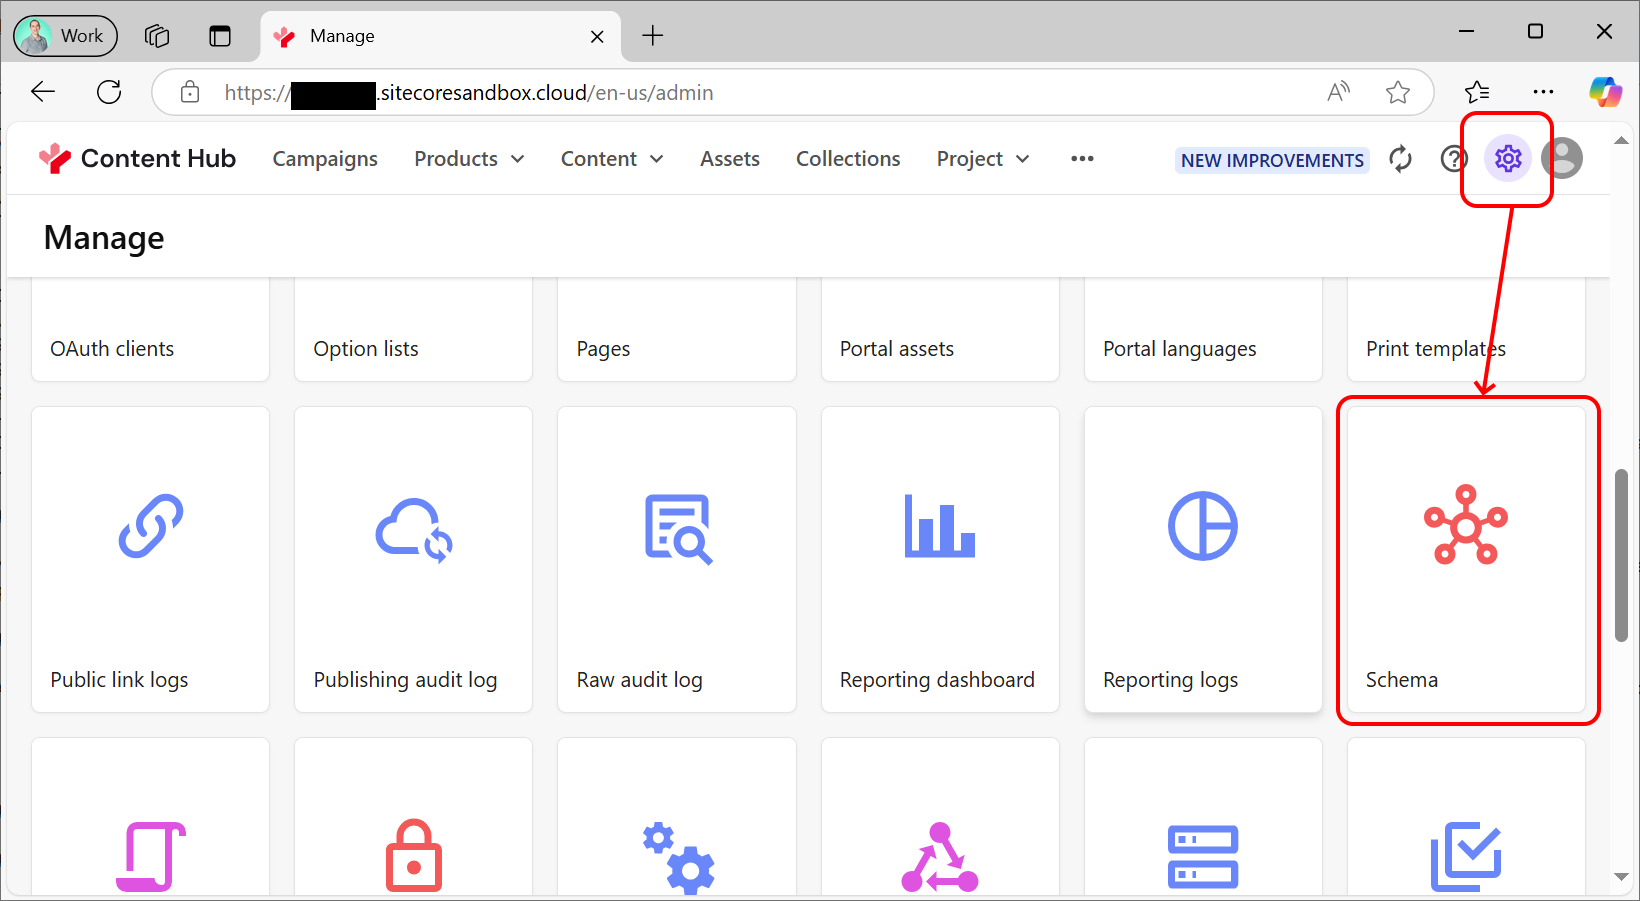
entity. You can manage this by clicking the "cog" item from the global nav bar, and picking "Schema" from the list of areas to manage:
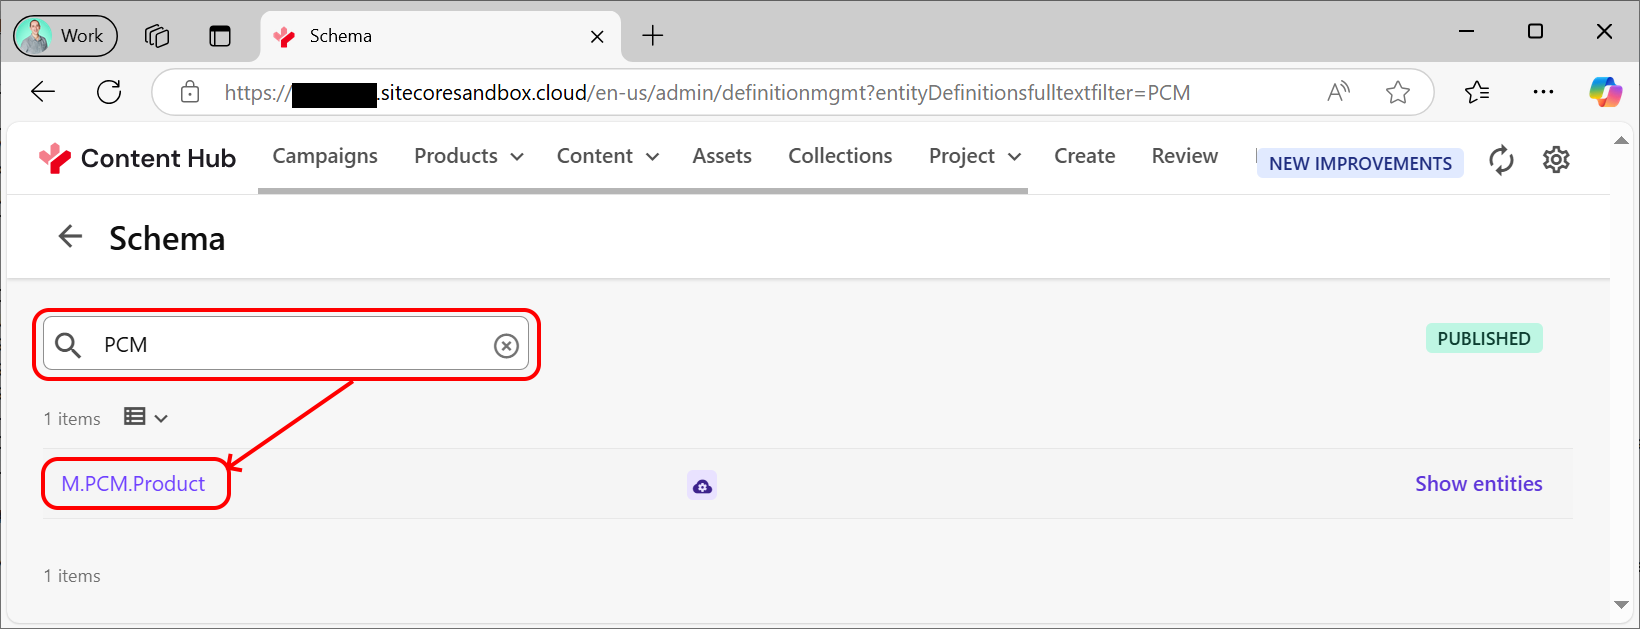
From here you can browse the list of schemas, or use the search box to find "PCM" and click the title of the correct one:
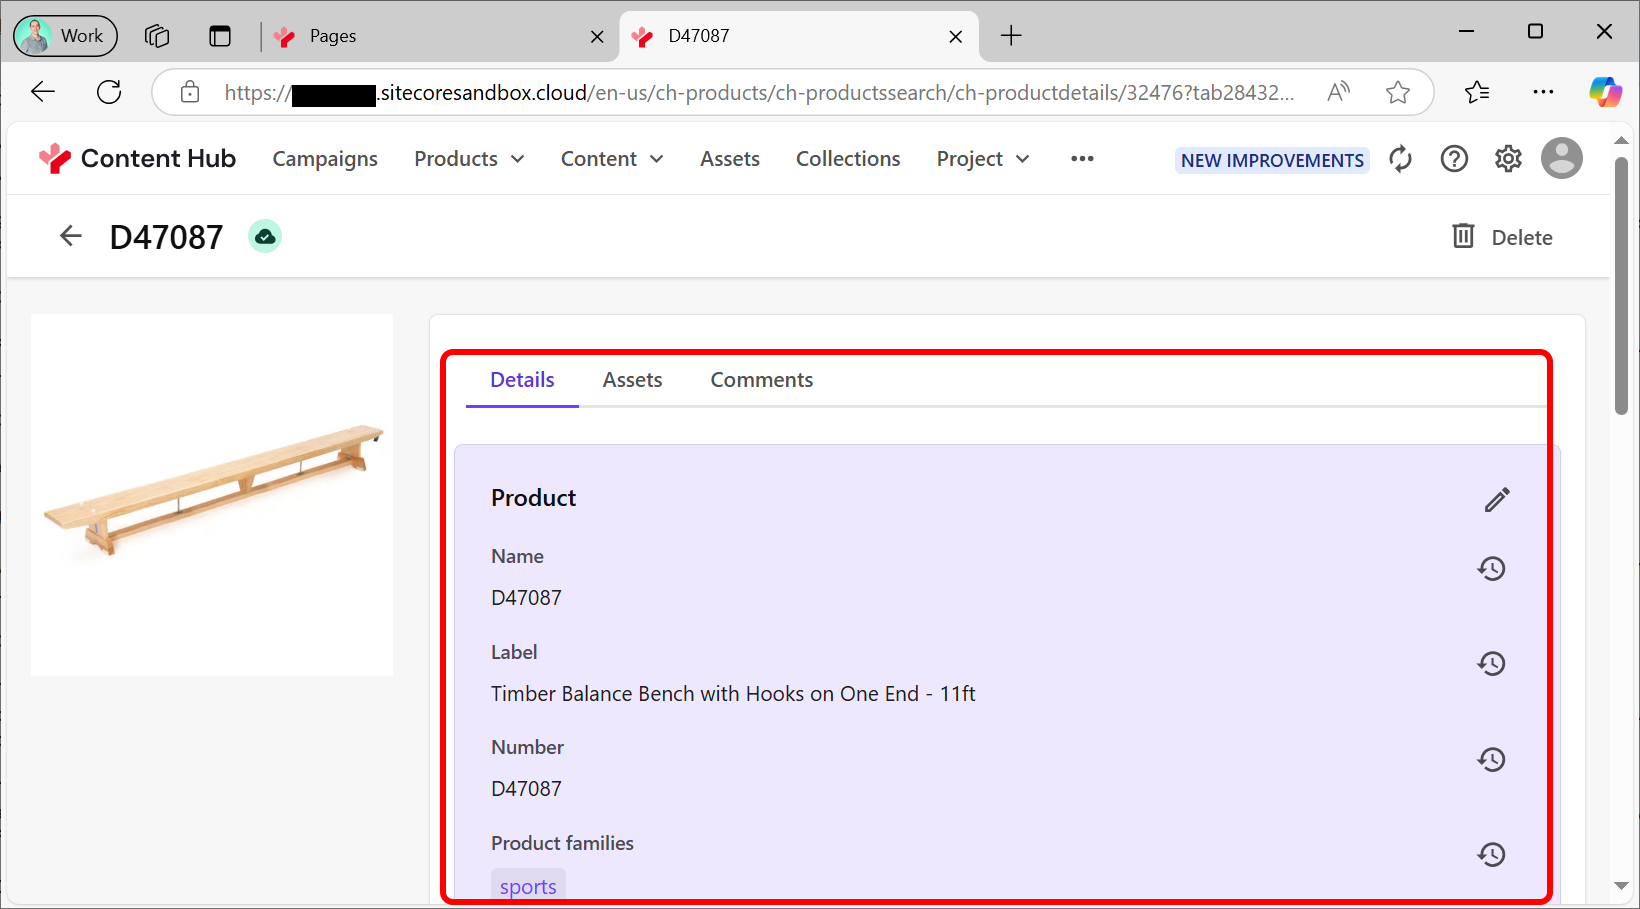
The default product schema includes names, SKUs ("Product Number" in this terminology) descriptions and images. The images are stored as a relation to zero or more
Asset
entries - Assets being the data type for Content Hub's DAM images. By default they don't include pricing here - I think on the basis that you probably have some sort of ERP or similar system that manages that data separately, with Content Hub dealing with enriching that raw data for marketing purposes. (But that is something you can add if your scenario needs it)
Again, a bit like Data Templates in Platform DXP or XM Cloud, the schema is split into groups and fields. Out of the box there are a load of groups which include the basic
Entity
data (like review states, and system fields) and the PCM-specific data like SKUs and descriptions. If you have data you want to add then you'll need to do some schema planning to decide what fields and what groupings to use for your scenario. But for the purposes of an example lets add a new group and two new fields: A max-discount-percentage and a URL slug.
Clicking the "New Group" button opens the dialog to configure a new field grouping:
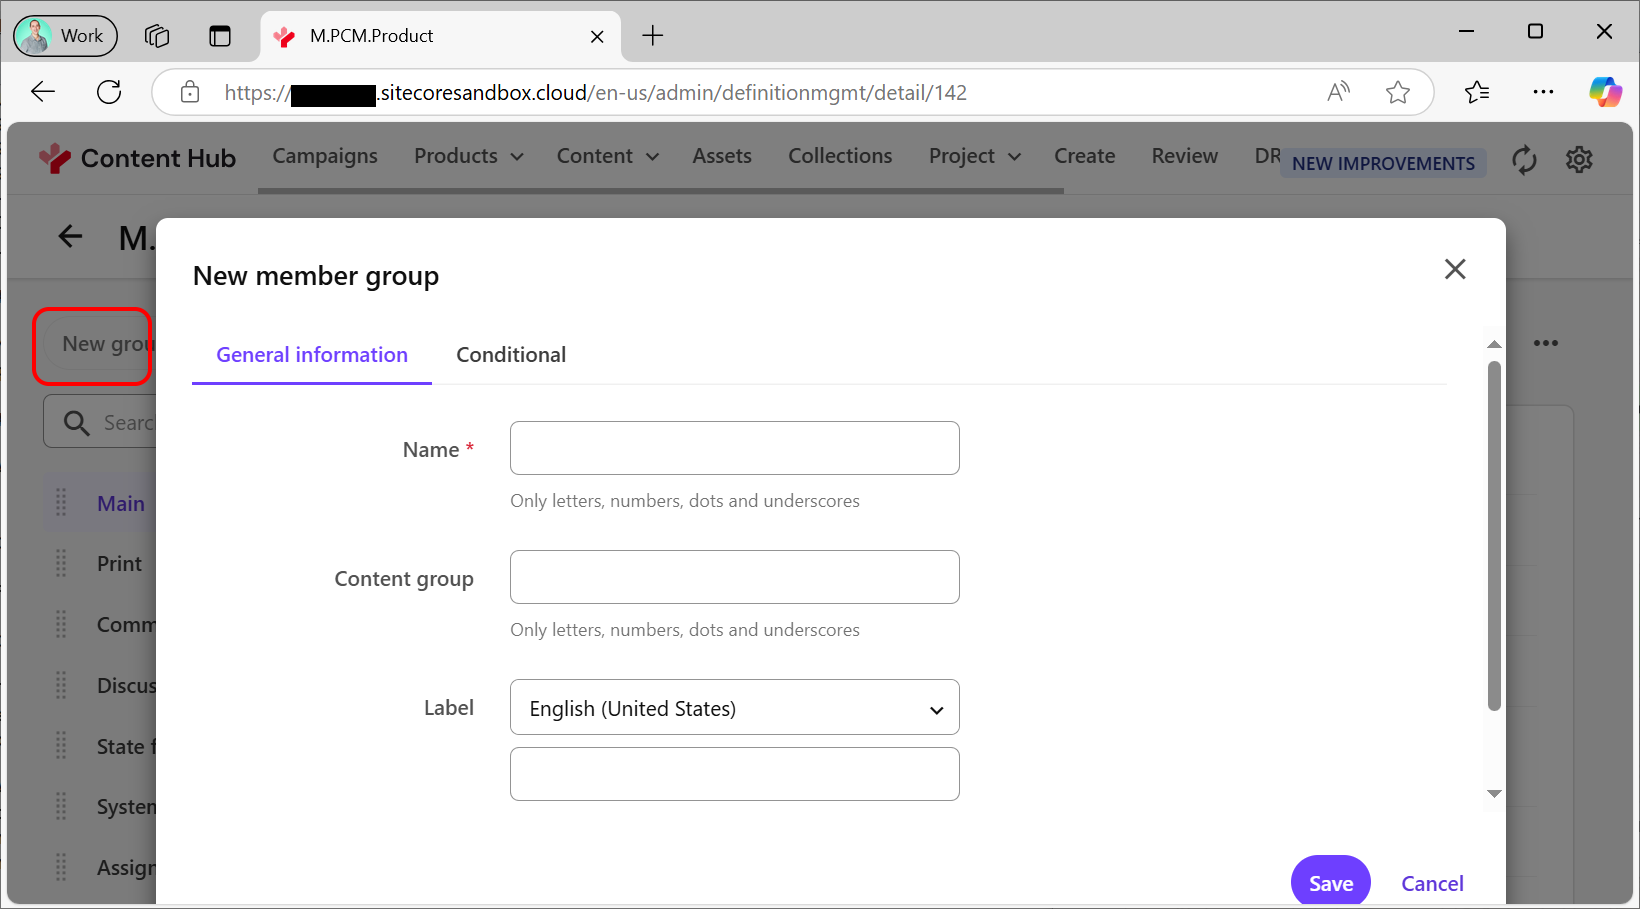
The
Name
field here is a programmatic identifier, so can't have whitespace or similar. The Label field provides the text to show in as the field's title in the UI, and can be translated for multiple languages if required. The most useful other feature here is the "Conditional" tab. This lets you control the visibility of the group based on other system data. Say you have a group which is only valid for Food products - you can make that group visible only when the product's type is in the "food" section of your taxonomy, for example. And once the new group is created it can be dragged around in the list of groups to set its order.
With a group selected the options for modifying it are contained in the right hand white-background region named for that group:
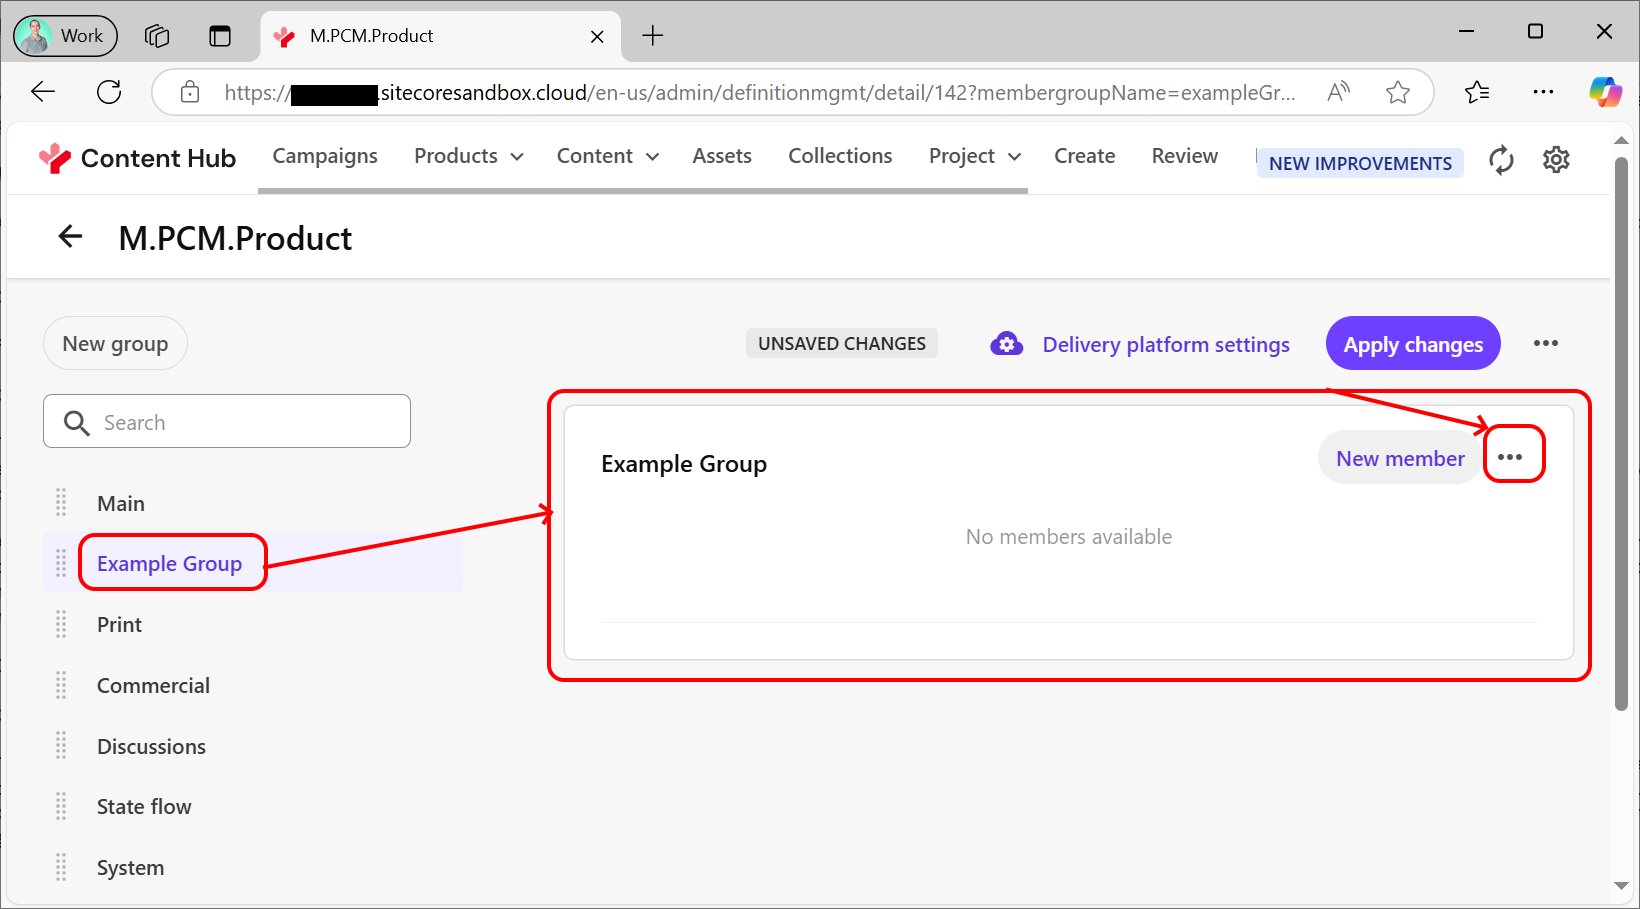
Adding a new field to the group is displayed as a button, but other options like editing the values from the "create" dialog and deleting a group are under the ellipsis (three dots) dropdown menu inside this region. Don't get confused with the ellipsis above that's outside the group's white region though - that manages the overall entity.
Clicking the "New Member" button prompts you to pick the type of field you're adding. There are two options here: "Properties" - which are basic fields you type in. And "Taxonomy" which allows for picking values from curated lists. That's a bit like the choice between a simple field type like "Single line text" or "Checkbox" in the Platform DXP, vs a reference field like "Multilist" or "DropLink".
For the example "URL slug" field a "Property" is required. That will then get you to pick the data type for the field (string is appropriate here) and then fill in the name / label etc data. This dialog also includes options for "make this field conditional" as the group had, but also allows you to set validation rules as well. Fields also have a set of options you can pick from for determining how the field will be handled elsewhere in the system:
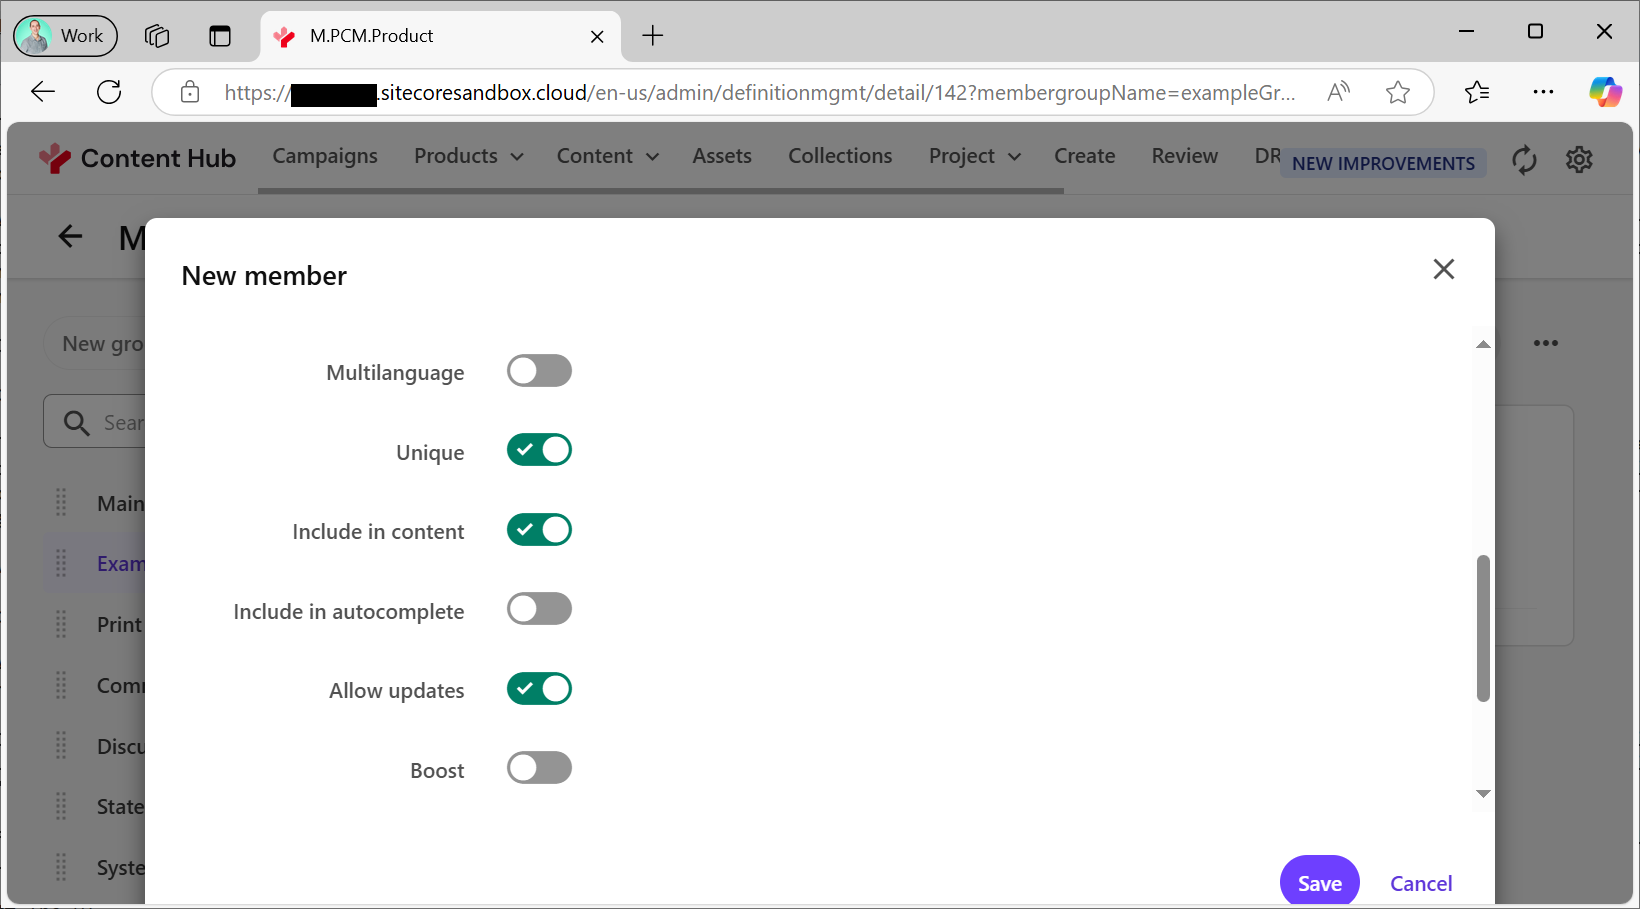
In this case "unique" is appropriate, as we don't want two products to have the same slug, and "content" enables this content to be included in Content Hub's internal search.
For the purposes of a more-fun example, lets make the discount field a taxonomy type. That requires two steps: Firstly creating the taxonomy data structure it will refer to and then secondly setting up the field itself.
Taxonomies are managed via the settings cog and the "Taxonomy" tile, where there is a "New Taxonomy" button.
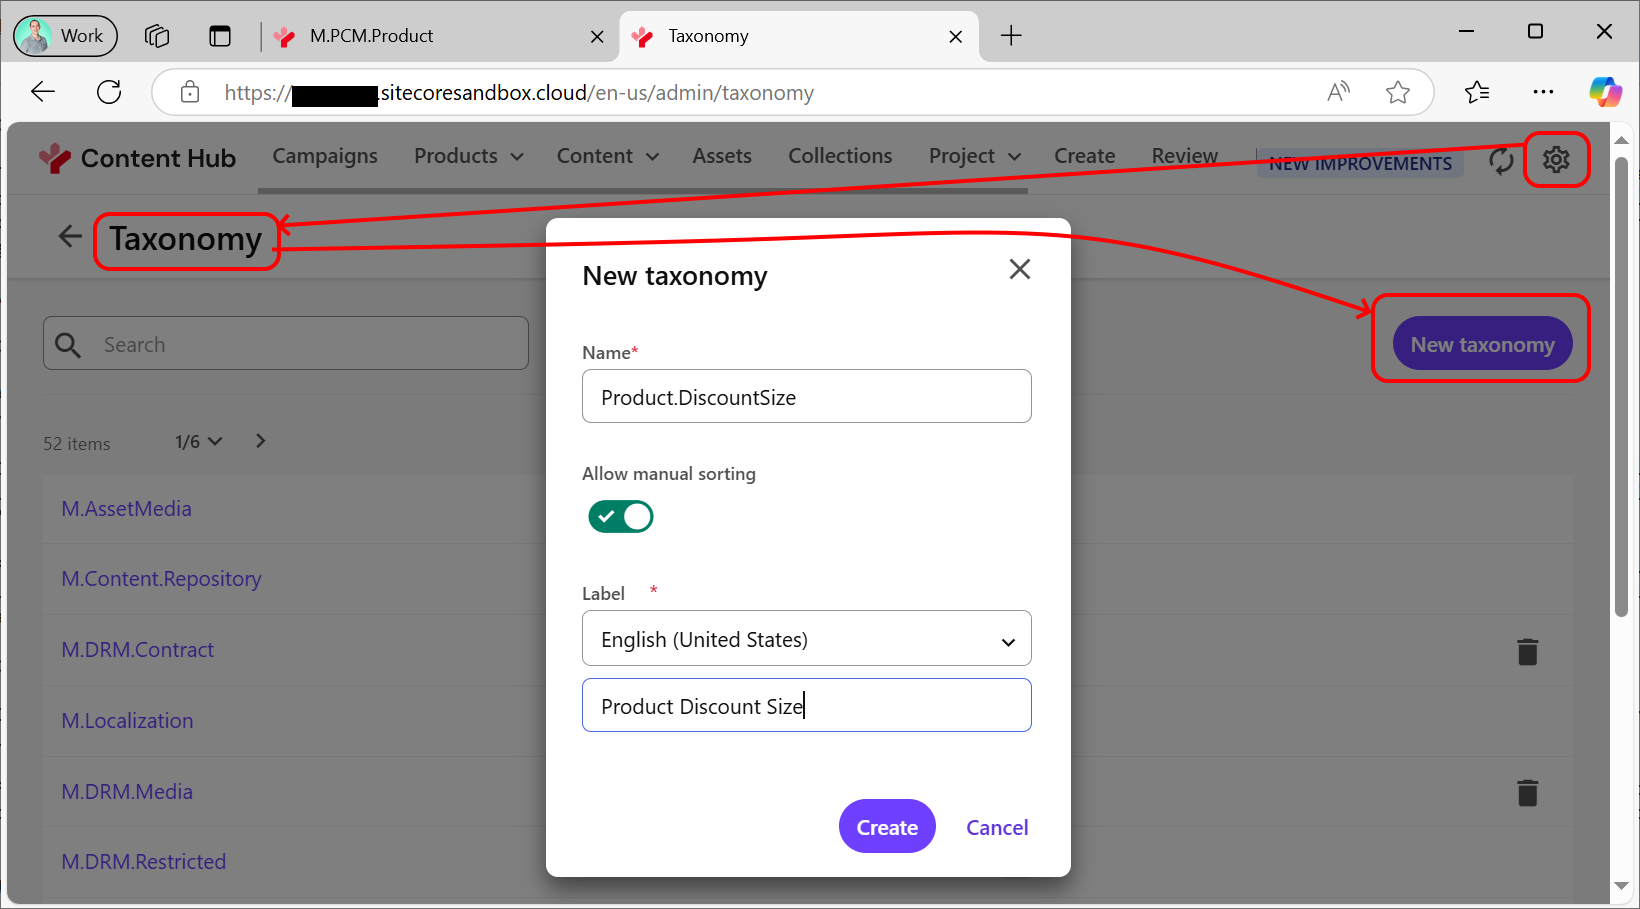
Once that's created you can add a set of values with the "+" icon:
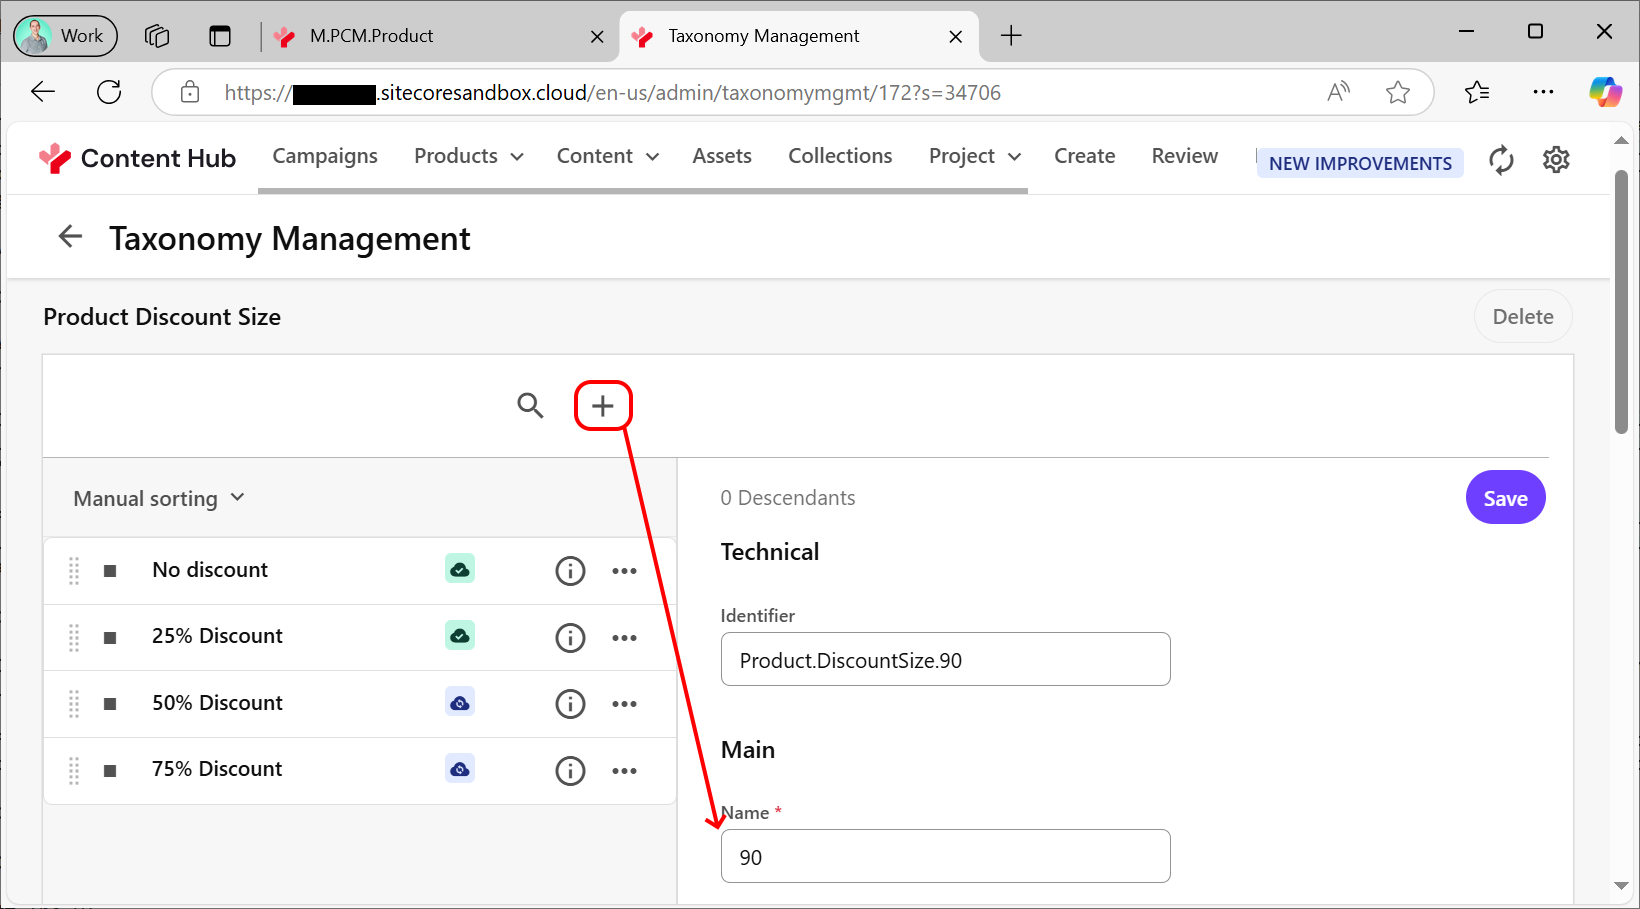
Note that while there is a field for "identifier" there, you want to fill in the "Name" field with the programmatic name and let the system fill in the identifier with the full value. You may also want to sort the created taxonomy entries by dragging them in the left column once they're saved.
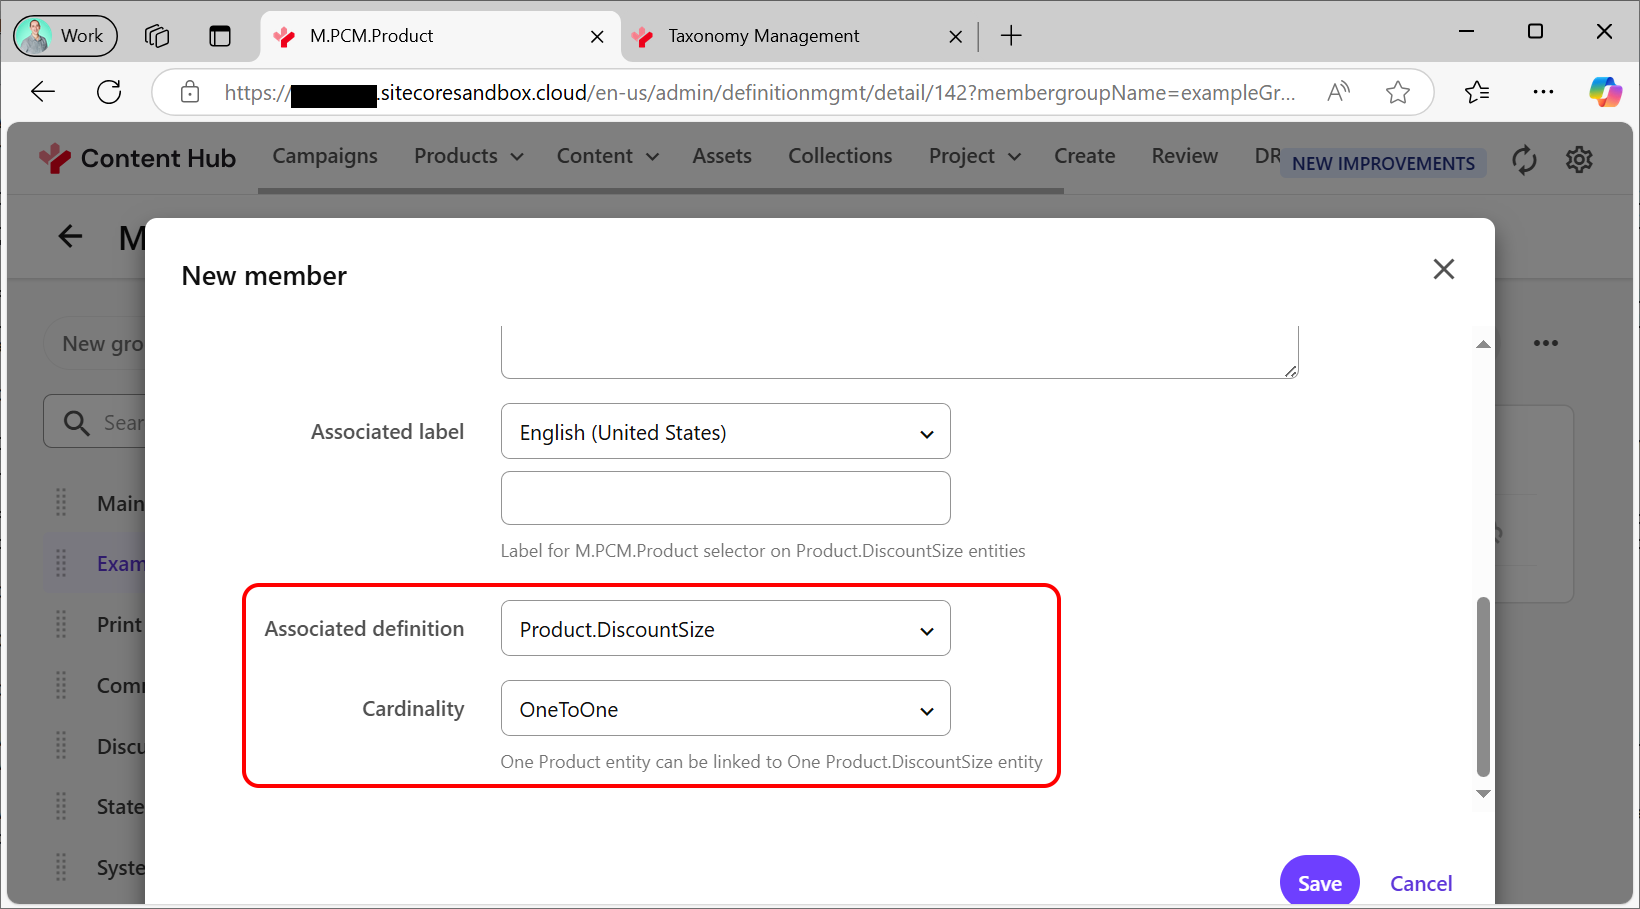
With that created you can add a Taxonomy-type field and give its name. You have to select your taxonomy in the "Associated Definition" field, and specify the cardinality here too. (You field can refer to multiple values from the taxonomy if you wish)
Once you've made your group and field changes you need to remember to click the "Apply Changes" button on your entity to save all this.
url copied!
Next up, you're going to want users to be able to see your fields and fill them in. So you need to customise the page config for the Product entity. This is a bit like adjusting the Presentation Details in the Platform DXP. This is managed via the "Pages" tile from the Settings cog:
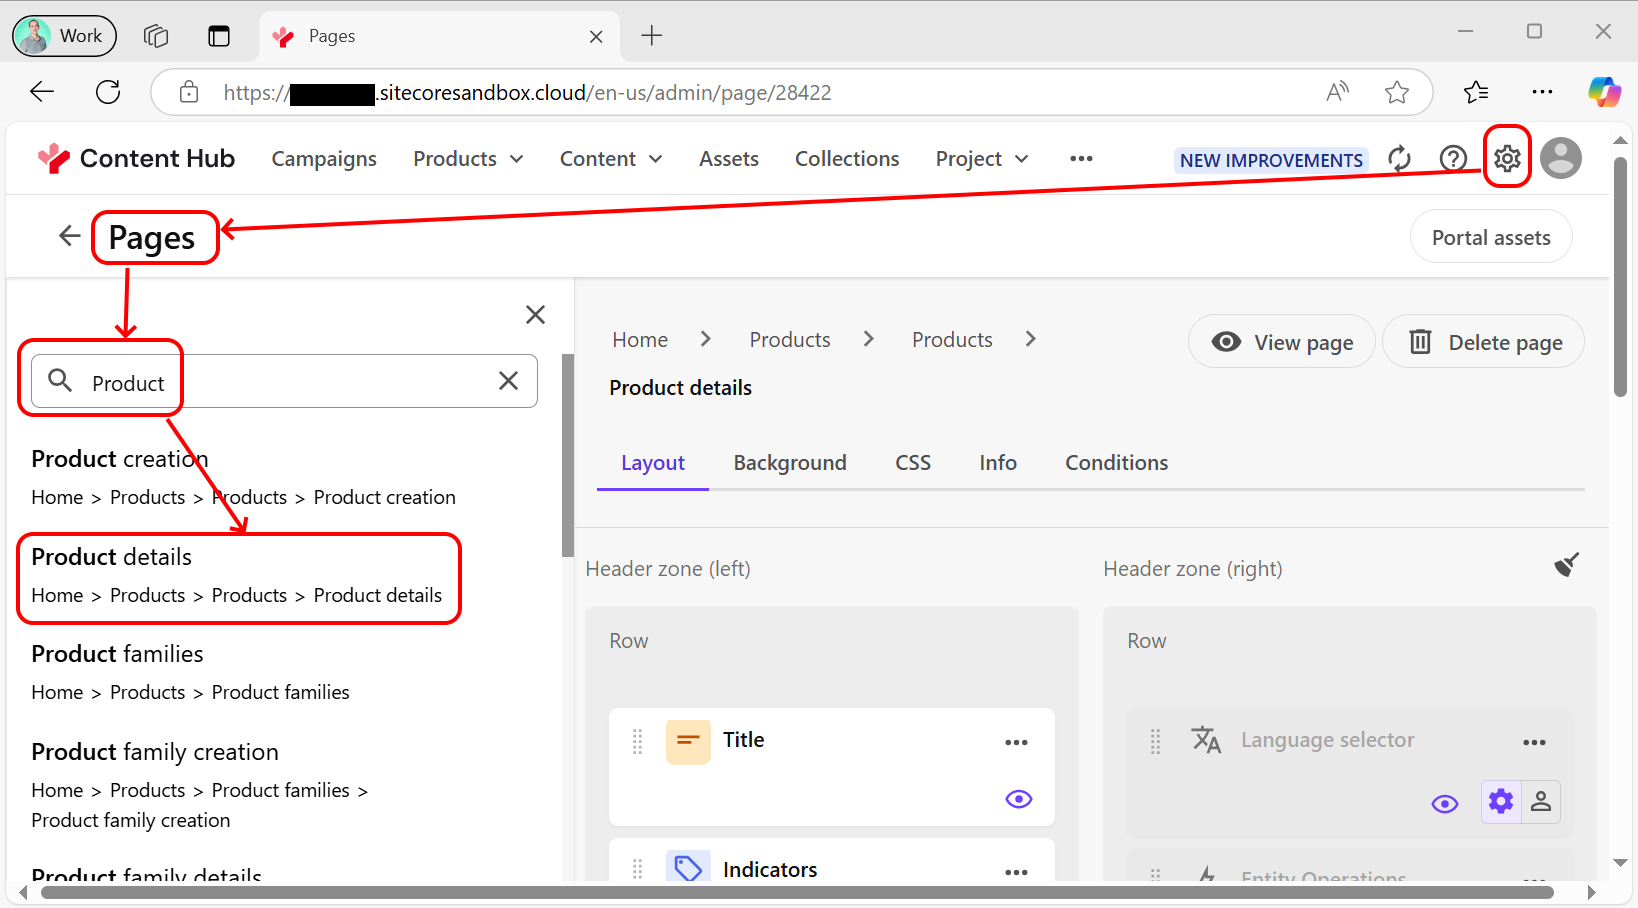
There are a lot of Pages in the system, so searching for "Product" is the easiest way to find and select the "Product Details" page - which is what the system calls the page where you manage the content of a product. You can also edit the "Product Creation" page if you want your extra fields to show up on the initial creation pop-over dialog.
The right-hand column here shows the structure of the UI displayed. It can be a bit cryptic, but each box represents a control and the regions represent something akin to the placeholders in Presentation Details. If you compare the published page's components to the boxes on this diagram you can usually work out the mapping from UI to component with a bit of thought.
In this case we're interested in the tab control that includes the product details, assets and comments so we can add the new group of fields into details:
When you look at the Page information you'll see a tab control in "Column 2" (which makes sense), but it only shows two things which might be tabs and none of them appear to be the right one:
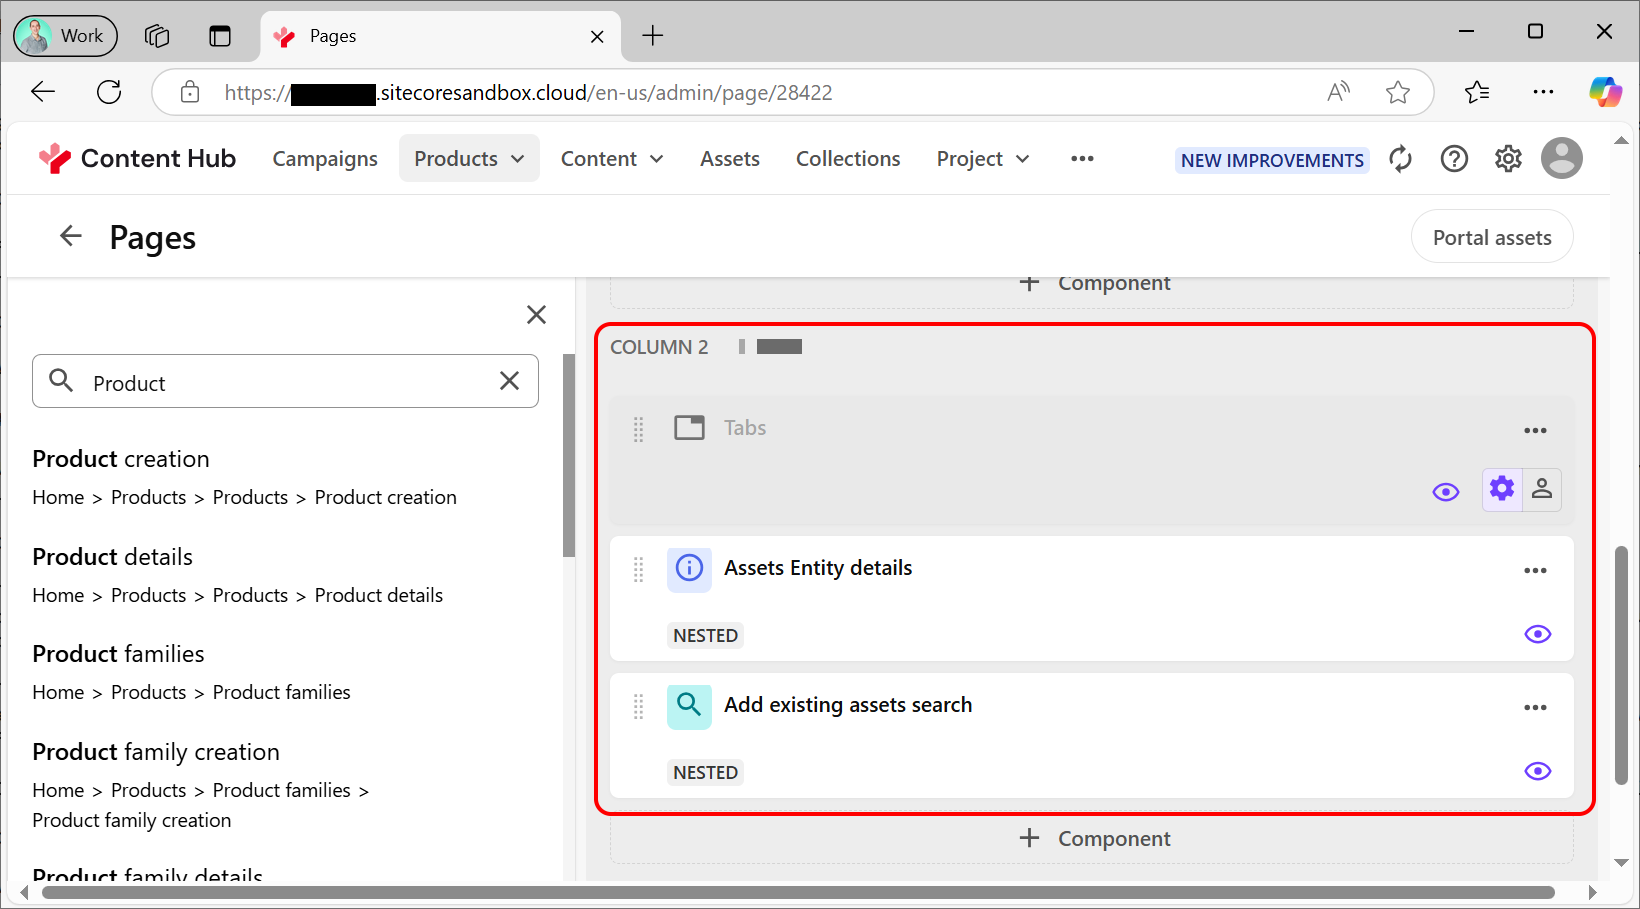
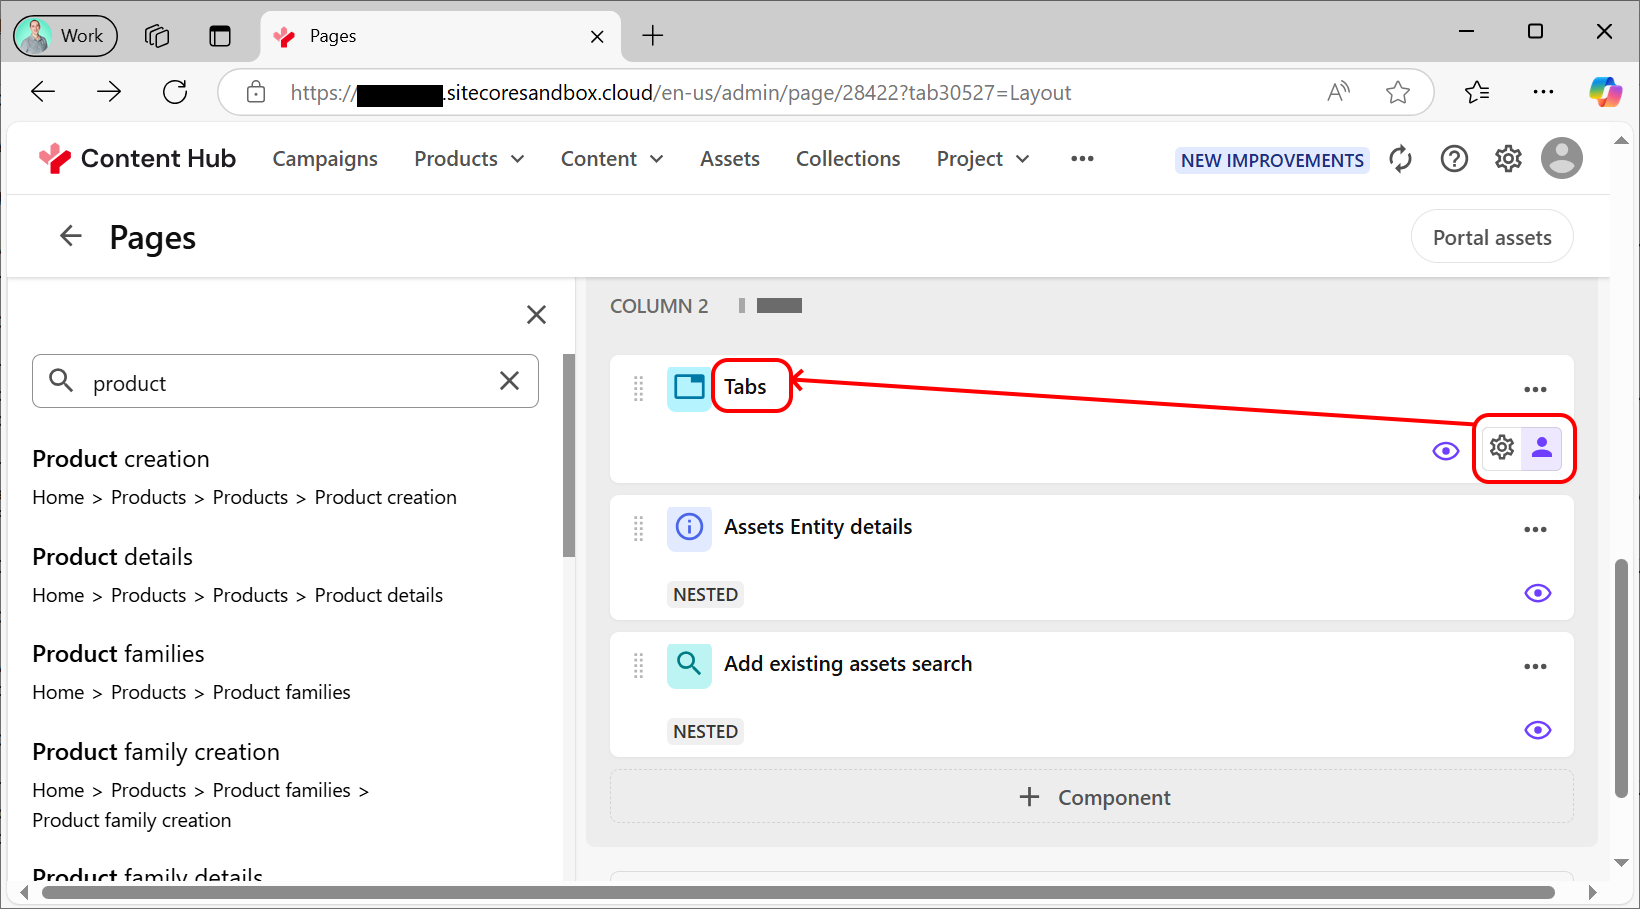
This confused me for a bit - but the answer is that under the "Tabs" control there are "cog and person" icons. These are a switch between showing the "default" options (cog) and allowing them to be customised (person). Clicking the person will change the tab control from greyed to colourful, and allow you to click the tab control title itself to get at its settings:
The other two controls after the "Tabs" one that you've just enabled aren't the tabs under the tab control - they're other controls on the main details page. Hence the names not matching up...
But now when you click the tab control to customise it, you'll see the correct three tabs in the left column of the new display:
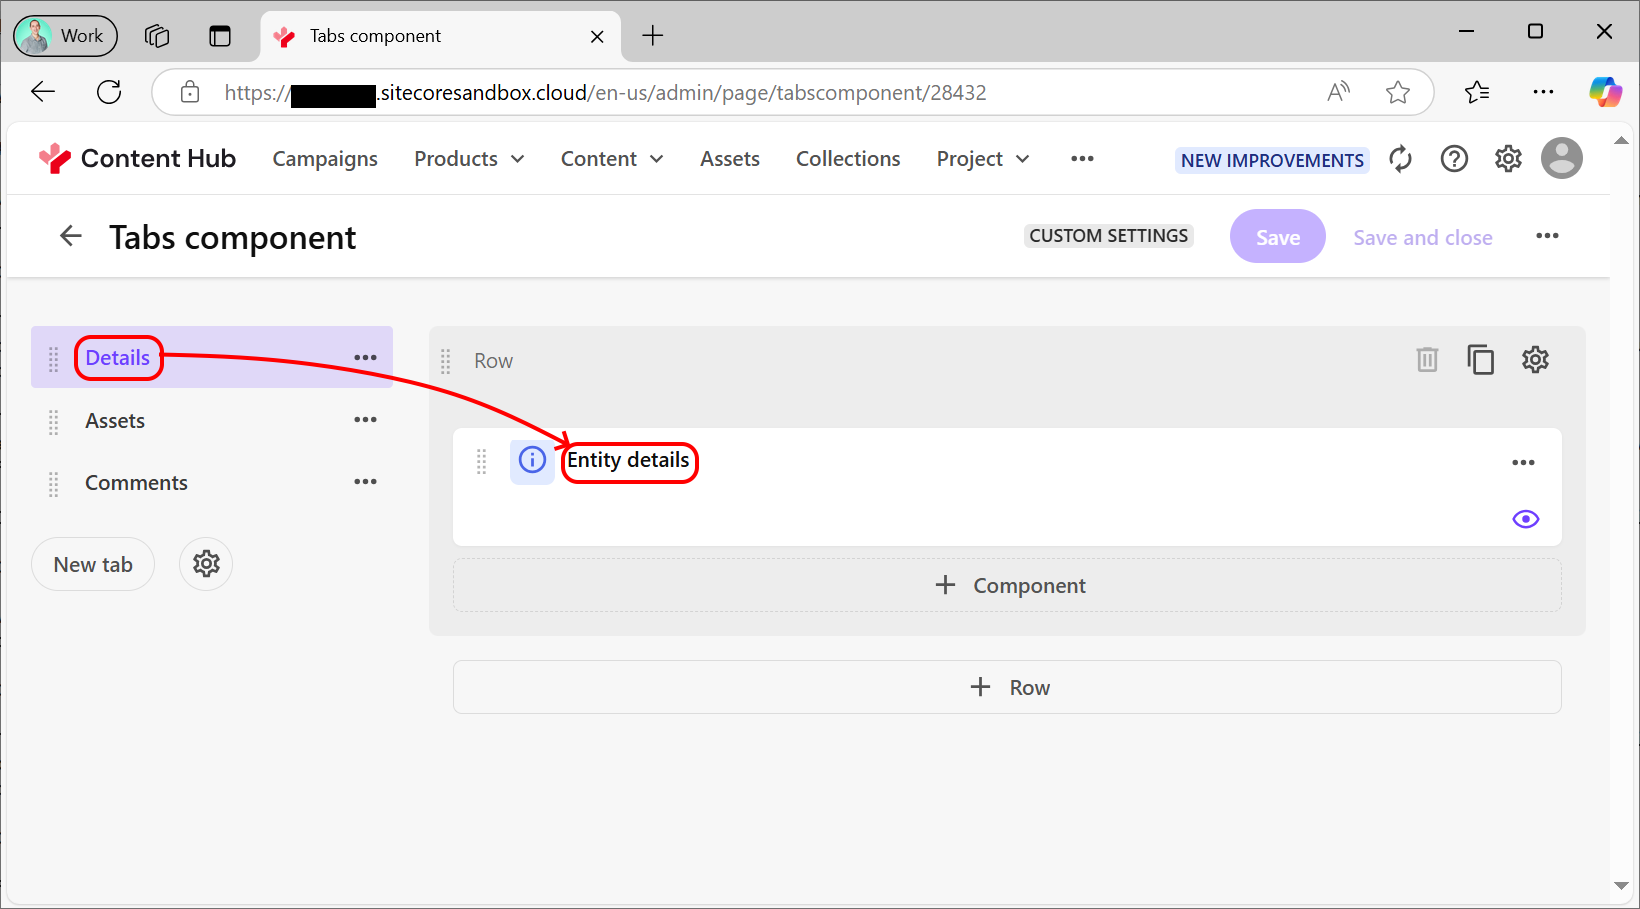
And you can click the "Entity Details" control title from the "Details" tab page.
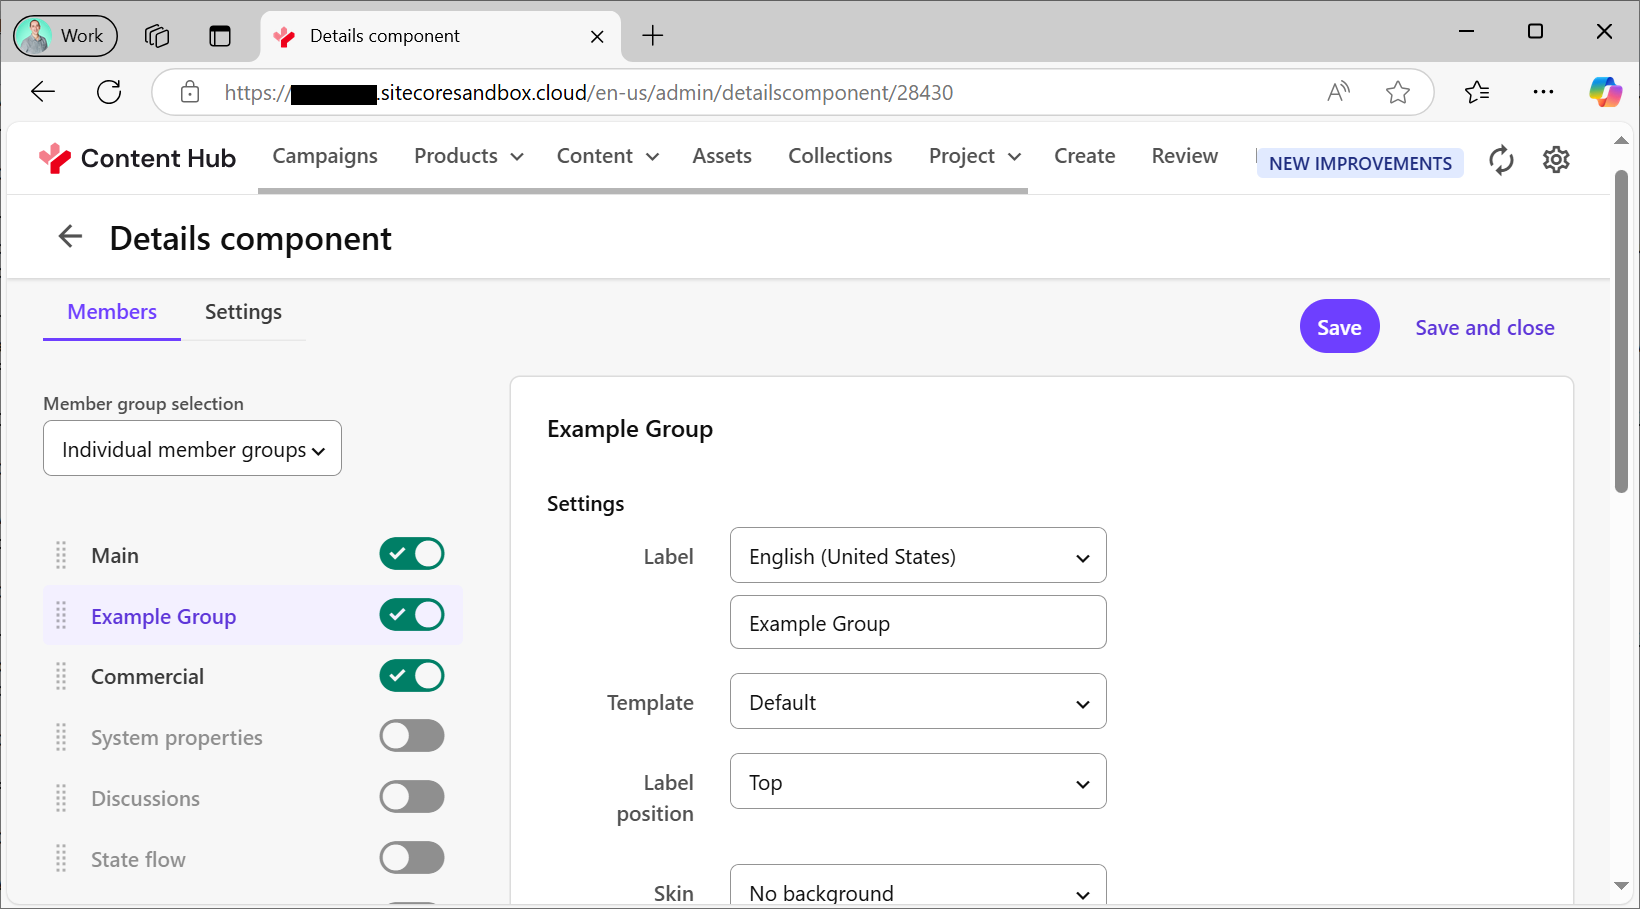
That gets you the page which shows all the schema details, and lets you enable your custom group and select it. You'll probably want to drag it up from the bottom of the list into the right order as well. Initially your group in the left column will have a grey switch showing it's hidden. Click that to turn it green and all the options will appear in the right column, and enable your group to be visible on the product details page:
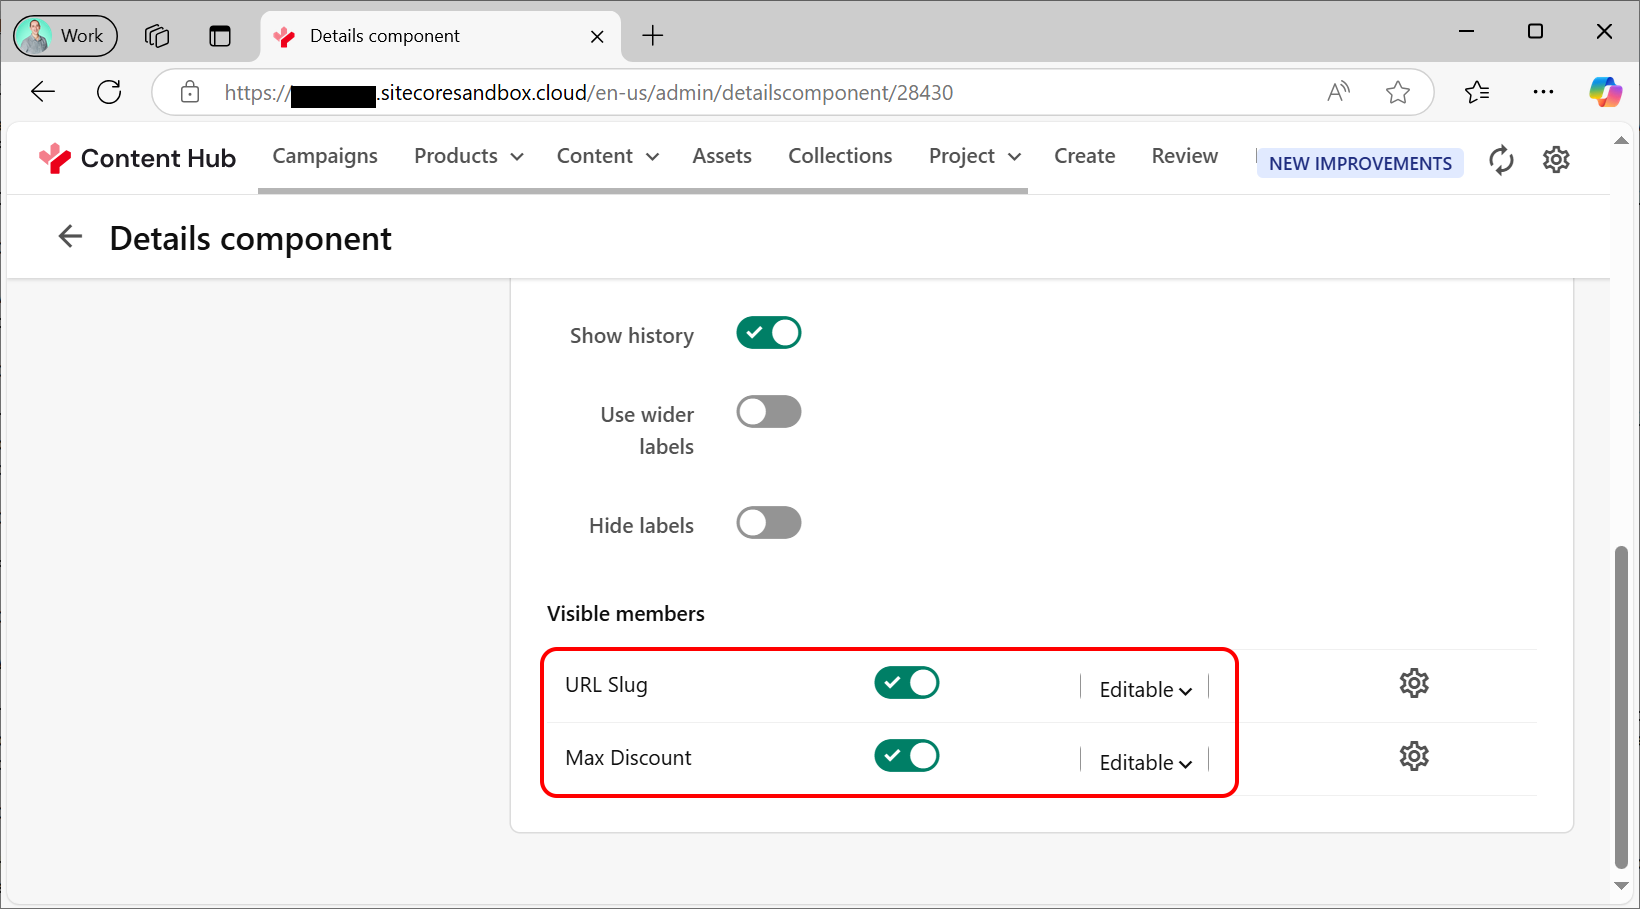
Here you can do stuff like set a background for your field group, and control exactly which fields from the group are visible. Make sure all your fields are enabled as appropriate, and set to "editable":
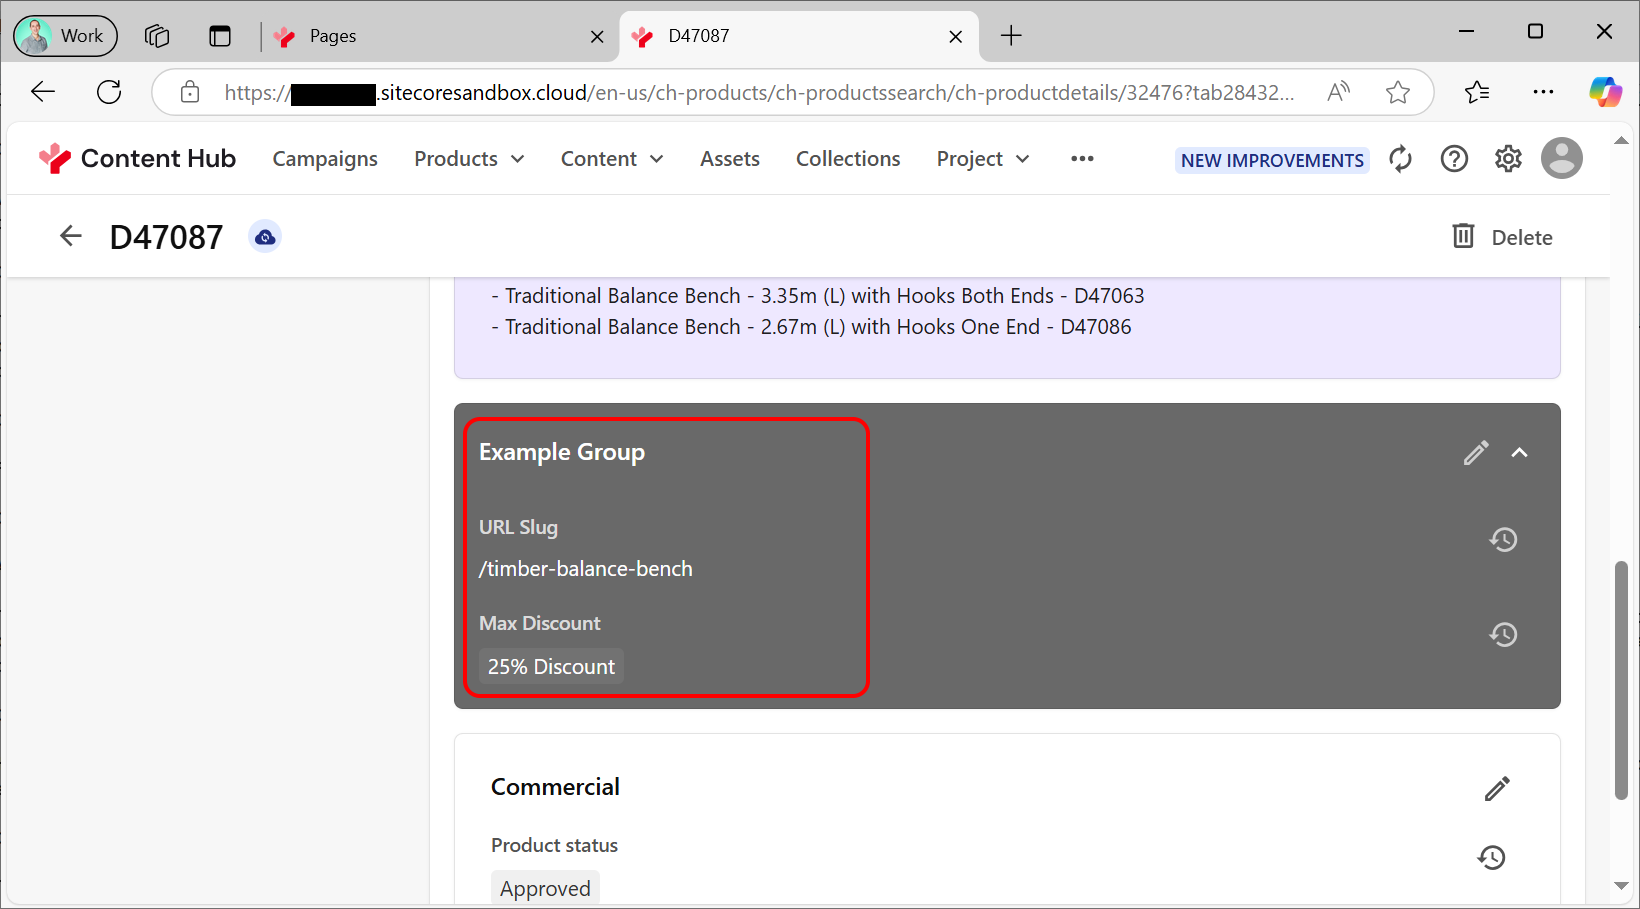
Then you can click "Save and close" at the top of this page, and your fields should now be visible in the product editing UI:
url copied!
So now we can configure whatever schema we need to support products, and we can get to editing data.
But what about rendering these products in another system, along with their images? Well that will be in part two's discussion of the related bits of GraphQL API...
↑ Back to top
