
Jeremy Davis
Sitecore, C# and web development
This is post 3 of 7 in a series titled Development environments with PowerShell DSC
- Development environments with PowerShell DSC – Introduction to DSC
- Development environments with PowerShell DSC – Windows Features
- Development environments with PowerShell DSC – Mongo DB
- Development environments with PowerShell DSC – SQL Server
- Development environments with PowerShell DSC – Sitecore
- Development environments with PowerShell DSC – Coveo CES
- Development environments with PowerShell DSC – Coveo REST API & Coveo for Sitecore
After last week's look at the basic setup of Windows features via PowerShell DSC, this week I'm looking at adding MongoDB into the mix. I wrote a post a while back about installing MongoDB via ordinary PowerShell, this post can re-purpose that logic in a new form...
Before I get going, couple of notes about the examples I'm including in this series of posts: They all have a call to `Start-DSCConfiguration` using the "-Force" flag to make DSC run this configuration immediately in "push" mode. However, the `Configuration` blocks declared should all work in pull configurations. Writing the scripts this way just makes them easier for people to try out without any other setup effort. Also the examples are all pretty much self-contained, so the overall configuration of a server using them would rely on many separate scripts. You don't necessarily need to have as many as I'm showing here. It's more to keep the examples clear and usable than to represent the "right" architecture. You're free to merge things together, or even break them apart further if that suits you.
The MongoDB install I'm aiming for needs three main steps:
 url copied!
We'll need somewhere to stick temporary files used by the installation, and we'll need assorted settings for MongoDB itself. We can extend the basic configuration data with the right new things:
@{
    AllNodes = @(
        @{
            NodeName = "WIN-AQEKG7L9SE8"
            Role = "Setup, WindowsFeatures, IE, SqlServer, MongoDB, Sitecore"

            TempFolder = "c:\dsc"

            Mongo = @{
                DataFolder = "c:\MongoDataFolder"
                ConfigFile = "mongod.cfg"
                MSIFile = "mongodb-win32-x86_64-2008plus-ssl-3.0.6-signed.msi"
                InstallerAppName = "MongoDB 3.0.6 2008R2Plus SSL (64 bit)"
                ServiceExe = "MongoDB\Server\3.0\bin\mongod.exe"
                RoboZip = "Robomongo-0.8.5-i386.zip"
                UserForLink = "Administrator"
            }
         }
    );
}
The
TempFolder
path will be the place we stick any files we need to copy over as part of the installation. Under the
Mongo
dictionary entry are all the setting for MongoDB and its components. I'll explain these as they're used below.
url copied!
Configuration MongoDBInstall
{
    param (
        [Parameter(Mandatory=$true)]
        [ValidateNotNullOrEmpty()]
        [String]
        $PackagePath
    )

    Node $AllNodes.where{ $_.Role.Contains("MongoDB") }.NodeName
    {
         #
         # We'll put the resources here
         #
    }
}

MongoDBInstall -ConfigurationData "\\vboxsvr\dsc\configData.psd1" -PackagePath "\\VBOXSVR\dsc\Mongo"
Start-DscConfiguration -Path .\MongoDBInstall -Verbose -Wait -Force
The resources in the examples below can all be added into the
Node
block here.
url copied!
File MongoDataFolders
{
    Type = "Directory"
    DestinationPath = "$($Node.Mongo.DataFolder)\db"
    Ensure = "Present"
}

File MongoLogFolders
{
    Type = "Directory"
    DestinationPath = "$($Node.Mongo.DataFolder)\log"
    Ensure = "Present"
}
By not supplying a
Source
for these resources and by setting
Type
to "Directory" we're telling DSC to create the folders specified by the
DestinationPath. The value of that path comes from the configuration properties above. (I wrote a previous
post about how DSC resolves these variables, which will help explain that)
The next thing we'll need is the config file for the MongoDB service. In my previous script I was generating that directly as the script ran, but for this version I've made this file a dependency of the script. Hence we can use another
File
resource to copy it over to our Mongo data directory:
File MongoConfigFile
{
    SourcePath = "$PackagePath\mongod.cfg"
    DestinationPath = "$($Node.Mongo.DataFolder)\mongod.cfg"
    Type = "File"
    Ensure = "Present"
}
Here the
SourcePath
is specified using the
-PackagePath
parameter to our
Configuration
so we can find the source file. That file includes some variables which need to be resolved though. My basic example config contains:
systemLog:
    destination: file
    path: $MongoDataFolder\log\mongod.log
storage:
    dbPath: $MongoDataFolder\db
(You can, of course, add whatever extra MongoDB configuration you need here)
We then need a bit of code to transform the
$MongoDataFolder
variables here into the correct path. We can do that with a
Script
resource - these let us run ordinary PowerShell code in our DSC file.
The first thing to notice here is the use of the
DependsOn
property of this resource. Usually DSC will work out the order to run resources in on its own, but if you have a scenario where execution order is important, then you can use this property to tell DSC how it should order things. The value of the
DependsOn
property is a string in the format "[]", as shown below.
Script resources have three other key properties that we need to fill in. These represent three specific scripts which get run at different times. The
GetScript
property can be used to return a dictionary of values describing the current state of a resource. The
TestScript
property contains code that checks whether the resource has any work to do. It returns false if there is work to do, and true if there is not.
For the purposes of this resource, these two scripts aren't particularly important, so they're not filled in here.
The final property is
SetScript, and this is the one which does all the hard work:
Script UpdateMongoConfigFile
{
    DependsOn = "[file]MongoConfigFile"
    GetScript = {
    }
    TestScript = {
        $False
    }
    SetScript = {
        $configFile = $using:Node.Mongo.ConfigFile
        $mongoDataFolder = $using:Node.Mongo.DataFolder

        $text = Get-Content "$mongoDataFolder\$configFile" | Out-String
        $text = $text.Replace(`$MongoDataFolder", $mongoDataFolder)
        $text | Out-File "$mongoDataFolder\$configFile"
    }
}
An important point to note is that these script blocks have an interesting challenge. Because the code in them runs when your
.MOF
file is executed, not when the DSC script is compiled into the
.MOF. Hence you have to be very careful about the scope of the variables you refer to. (This is discussed in my previous post on DSC variables) But the key thing here is that when we access config variables that are coming from the
$Node
dictionary we have to use the special
$using:Node
syntax to make sure the values are correctly processed.
Other than that the code's simple – it just reads the base config file from disk, replaces the variable names with their value, and then writes the result back out again...
So the next step is installing MongoDB itself. That needs two steps. The first is a simple one to copy the installer over from our folder full of dependencies into our local temporary folder:
File MongoMSI
{
    SourcePath = "$PackagePath\$($Node.Mongo.MSIFile)"
    DestinationPath = "$($Node.TempFolder)\$($Node.Mongo.MSIFile)"
    Type = "File"
    Ensure = "Present"
}
Then we can run the installation. Helpfully DSC has a resource whose purpose is installing
.EXE
and
.MSI
packages. While it's a bit restrictive about the packages it can install, MongoDB plays nicely with it, so we can use the
Package
resource as follows:
Package MongoDB
{
    DependsOn = "[file]MongoMSI"
    Ensure = "Present"
    Path = "$($Node.TempFolder)\$($Node.Mongo.MSIFile)"
    Arguments = 'ADDLOCAL="all"'
    Name = "$($Node.Mongo.InstallerAppName)"
    ProductId = ""
}
Again we have a dependency here - we can't install the package until it's been copied into our temp folder. But there are two other things which need pointing out. The first is the
Arguments
property, which you use to pass in any parameters for the install package. In this case we're just saying "install everything".
The second is the
Name
and
ProductID
properties. These two are used to specify how DSC can test if your package is installed already or not. (Remember that DSC attempts to avoid repeating tasks it doesn't have to) You only have to specify one of these parameters.
Name
needs to be the text which appears in the "uninstall programs" list in Windows, and
ProductID
is the unique package GUID for the installer. Generally, Name is easier to find. I've made it a parameter here, as this will change with different versions of MongoDB – so if we specify a different installer in our config we need to specify a different
Name
as well.
url copied!
Script MongoService
{
    DependsOn = "[package]MongoDB", "[script]UpdateMongoConfigFile"
    GetScript = {
        $instances = gwmi win32_service -computerName localhost | ? { $_.Name -match "mongo*" -and $_.PathName -match "mongod.exe" } | % { $_.Caption }
        $res = $instances -ne $null -and $instances -gt 0
        $vals = @{
            Installed = $res;
            InstanceCount = $sqlInstances.count
        }
        $vals
    }
    TestScript = {
        $instances = gwmi win32_service -computerName localhost | ? { $_.Name -match "mongo*" -and $_.PathName -match "mongod.exe" } | % { $_.Caption }
        $res = $instances -ne $null -and $instances -gt 0
        if ($res) {
            Write-Verbose "MongoDB is already running as a service"
        } else {
            Write-Verbose "MongoDB is not running as a service"
        }
        $res
    }
    SetScript = {
        $configFile = $using:Node.Mongo.ConfigFile
        $dataFolder = $using:Node.Mongo.DataFolder
        $service = $using:Node.Mongo.ServiceExe

        $MongoExe = "$using:Env:ProgramFiles\$service"
        $ConfigFile = "$dataFolder\$configFile"

        &$MongoExe --config $ConfigFile --install
    }
}
With this one I've filled in the
GetScript
with some code that uses a call to the WMI API to ask for a list of any services called "Mongo" that are currently running. It then uses this data to create a dictionary containing a boolean to say whether the service is installed, and how many instances have been found. The
TestScript
property uses a similar query to decide if the installation needs to proceed or not.
In the
SetScript
block, it extracts the various config variables, works out the path to the Mongo executable and its config file, and then it runs the
.EXE
passing in the
--config
and
--install
parameters to tell it to set itself up as a service.
Once that's done, the second step is that we need to make sure our service is configured to start automatically. Luckily, DSC has a resource called
Service
which can deal with changing the state of Windows services. All we have to do is specify the name of the service, how we want it to start up and what state it should be in now:
Service StartMongoService
{
    DependsOn = "[script]MongoService"
    StartupType =  "Automatic"
    Name = "MongoDB"
    State = "Running"
}
With that done, we have MongoDB running as a service in the background.
url copied!
File GetRobomongoZip
{
    SourcePath = "$PackagePath\$($Node.Mongo.RoboZip)"
    DestinationPath = "$($Node.TempFolder)\$($Node.Mongo.RoboZip)"
    Type = "File"
    Ensure = "Present"
}
With the file copied over, then we have to unzip it. Again, DSC provides us a helpful resource:
Archive
can unpack a zip file. This uses the
$Env:ProgramFiles
variable to find the appropriate place to unpack the zip to:
Archive UnzipRobomongo
{
    DependsOn =  "[file]GetRobomongoZip"
    Path = "$($Node.TempFolder)\$($Node.Mongo.RoboZip)"
    Destination = "$Env:ProgramFiles\RoboMongo"
}
You can run RoboMongo now, but it's easier if we have an icon to click on rather than having to go find it in the Program Files folder. So we can use another
Script
resource to add an icon to a user's desktop via the
Windows Shell's COM API:
Script AddRobomongoLink
{
    DependsOn = "[archive]UnzipRobomongo"
    GetScript = {
        $usr = $using:Node.Mongo.UserForLink
        $result = Test-Path "C:\Users\$using:usr\Desktop\Robomongo.lnk"
        @{
            "Installed" = $result
        }
    }
    TestScript = {
        $usr = $using:Node.Mongo.UserForLink
        $result = Test-Path "C:\Users\$using:usr\Desktop\Robomongo.lnk"

        $result
    }
    SetScript = {
        $usr = $using:Node.Mongo.UserForLink
        $zip = $using:Node.Mongo.RoboZip

        $folder = [io.path]::GetFileNameWithoutExtension($zip)

        $WshShell = New-Object -comObject WScript.Shell
        $Shortcut = $WshShell.CreateShortcut("C:\Users\$usr\Desktop\Robomongo.lnk")
        $Shortcut.TargetPath = "$Env:ProgramFiles\RoboMongo\$folder\Robomongo.exe"
        $Shortcut.Save()
    }
}
Here the
GetScript
and
TestScript
code checks to see if the icon file exists with a simple check against the file system.
The
SetScript
extracts the correct variables and calculates the location of the user's desktop. It can then create and call the
WScript.Shell
COM object to create and save the shortcut.
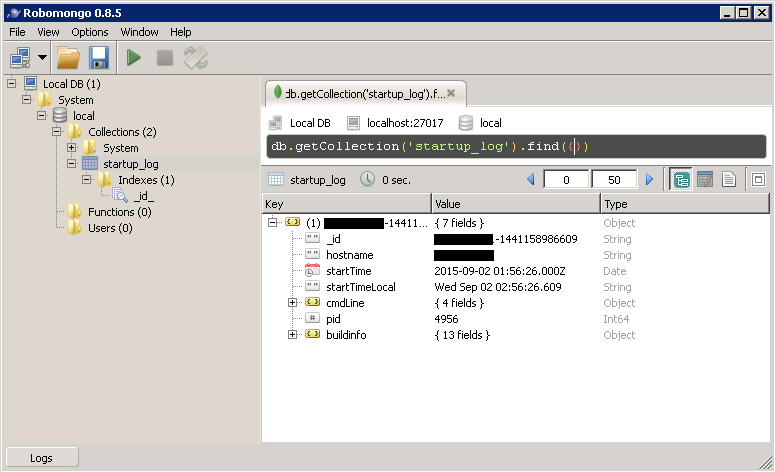
And with that done, you can fire up RoboMongo and check out what's in your MongoDB data store:
Next week, we'll turn out attention to SQL Server.
↑ Back to top
